A trip to a picnic is a desirable event for most citizens. At the same time, there is a problem of saving luggage space, which significantly limits the list of transported items. Significantly save space in the trunk will allow the use of folding furniture. Today we will talk about options for collapsible picnic tables.
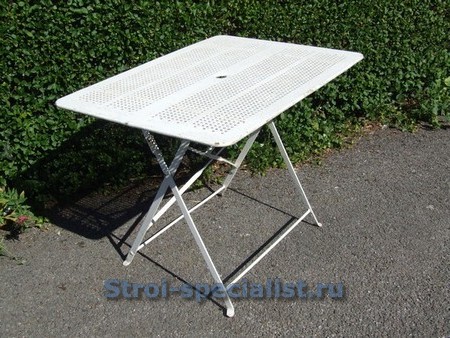
Currently, you can find many options for the execution of such a simple piece of furniture as a picnic table. All of them can be divided into several groups depending on the material used and design features. Aluminum tables are distinguished by sufficient strength and lightness. The ability to manufacture prefabricated models allows you to reduce the space required for transportation. The high corrosion resistance of the metal makes the life of aluminum furniture quite long. The only possible minus is the strength of the connection of parts during assembly and the quality of their workmanship. When choosing, pay attention to the performance properties of the product.
A separate place among metal structures is occupied by tables with folding legs. They can be made not only from aluminum-containing alloys, but also from steel parts of small thickness. In this case, the possible load on the table will be significantly limited.
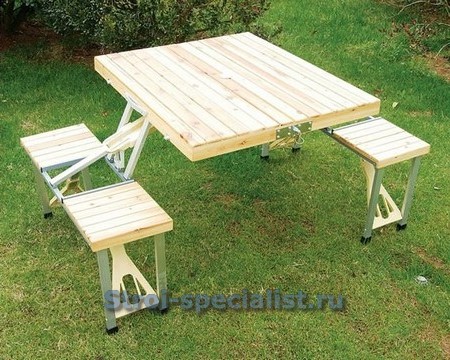
The second common material used for such products is wood. The market is also replete with picnic tables made of many wood species in various designs. There are both collapsible options on round or square legs, and folding.
The last type is combined structures that combine different materials. Options for combining wood and plastic are possible.

Recently, tables have appeared made of metal and wooden parts, folding into compact boxes.
Self-made collapsible table
A large selection of product options in retail chains should not limit the creative abilities of home craftsmen. Many designs of picnic tables can be made by hand. Let's look at some of the simplest options.
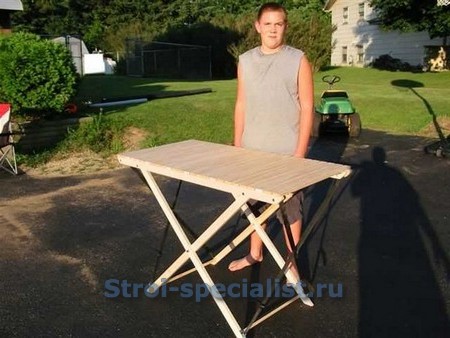
The most accessible material for modern homemade is wood, so the tables we describe are made from it. For the first option, you will need 8 meter rails with a section of 45x20 mm.
The type of wood does not matter much, the main thing is the absence of large knots in the details that can adversely affect the strength of the product.
Connect four slats in pairs with glue, through small inserts between them in the form of scraps 50x45x20. Stepping back from the ends of 15 and 200 mm, drill two through holes with a diameter of 6 mm from both ends. Next, in addition to the glued joint, fasten the pairs of rails with round head bolts. Make the connection only through the outer holes, because the middle holes will be used already at the place where the table is deployed to install the legs.
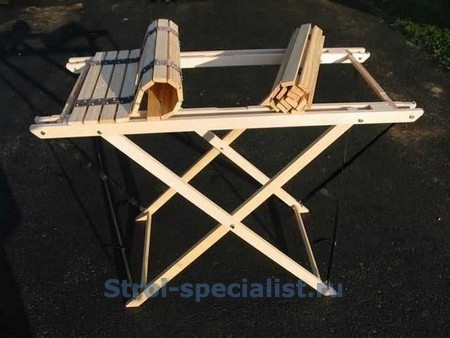
The remaining rails are also bolted in pairs. To do this, we drill 6 mm through holes at a distance of 450 mm from the lower ends, previously sawn off at an angle of 45o. These will be the legs of our table.
To make the tabletop, take 26 planed slats 60 cm long and 20x40 in section and a pair of strong nylon ribbons 1 meter each. Lay the boards on a flat, flat surface with a gap of about 5 mm between them. To control the distance, use a wooden lath of suitable thickness. Using small nails or a furniture stapler, attach the ribbons to the slats. When disassembled, the table has small dimensions.
To assemble it, it is enough to bolt the legs and roll out the countertop.
To avoid displacement of the legs of the structure, in the lower part of the table, near the beveled ends, drill holes with a diameter of 20 mm to a depth of 10 mm so that they are directed inward. When assembling, firmly insert round crossbars 580 mm long into the resulting sockets. In the upper part - under the tabletop, install square-section spacers, this will prevent changes in the geometry of the structure. They are fastened with bolts to the glued inserts between the rails, through pre-drilled holes.
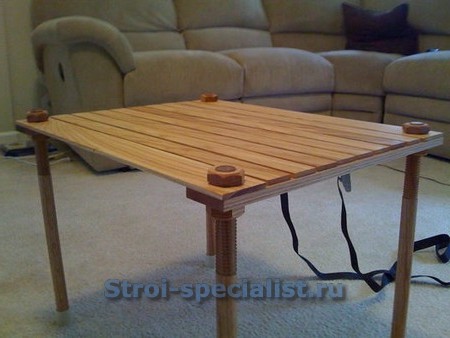
The second version of the table is equipped with round legs and the same folding tabletop as in the first version.
To implement such an idea, you need to use a great way to attach the legs to the base.
The legs are conveniently made from scraps of birch cuttings for agricultural tools. Saw off 4 equal parts with a length of 600 mm., Make the countertop as described above, but use three transverse tapes. Its size in plan should be approximately 600x600 mm.
Additional structural strength will be given by two steel strips with a section of 2x25 with holes for attaching to the legs of the table.
The assembly of the product is carried out by means of M6 furniture bolts with semicircular heads. For screwing steel fasteners into wooden parts, it is convenient to use mortise nuts.
They have external and internal threads. The first one is quite large, designed for screwing a nut into a pre-drilled hole in the ends of the legs. For the same purpose, a hexagonal slot was made for the corresponding key. The second thread - metric - is designed for screwing into the nut of the appropriate size bolt.
Due to the small number of parts in disassembled form, the table has small dimensions and can easily fit in the trunk of any car.
A similar table can be made without the use of steel fasteners. It is enough just to make a large carving on the legs and make suitable wooden nuts. This option looks original and is not inferior in strength to the previous one, however, it will be quite difficult to complete it, especially if you have only basic knowledge of woodworking.
The third type of picnic tables can be made from flat parts, which will also contribute to their compactness while maintaining strength. At the same time, you can combine it with seats, which will not require additional furniture for a picnic trip.
Moisture resistant plywood or OSB will be a suitable material for self-production of such a design.
Sheets 15 mm thick will be enough to achieve the desired strength of both the benches and the table itself. On a sheet of material, mark out the shape of the parts. To do this, it is convenient to use a pre-applied grid with cells of 10x10 centimeters. It is convenient to get the same structural elements by making one of them and, using it as a template, trace around the contour with a pencil. It is better to cut sheets with a jigsaw. Parts are connected without glue. To do this, during manufacture, it is necessary to cut grooves of sufficient depth with a width of 15 mm in the details. The assembly takes place on the principle of children's three-dimensional puzzles.
Dear readers, if you still have questions, ask them using the form below. We will be glad to communicate with you;)