Any master, equipping a home forge, acquires a minimum set of tools and accessories. But, as a rule, the simplest technological operations with metal blanks are done only at the first stage.
With gaining experience with iron, there is both a desire and a need to do artistic forging - this is both a home decoration and additional income. Unfortunately, the machine for giving samples a spiral shape - a snail - is practically not found on sale. One way or another, but home craftsmen, as a rule, make it with their own hands. Features of self-design and assembly of a snail for cold forging are the topic of this article.
Snail Features
The author specifically decided to draw the reader's attention to a number of points. This will help you avoid some mistakes in the future. For example, having dealt with the device of the snail and the principle of its functioning, someone will want to assemble their own device, different from those whose drawings will be presented below.
Such a device will completely (if we are talking about do-it-yourself equipment) allow bending samples with a cross section (square side) of no more than 10 - 12 mm. A snail model with "manual control" is implied. With more overall samples in everyday life, almost no one has anything to do. The machine can be improved by installing a drive and an electric motor.
But how rational is this for a small home forge?
- Cold forging is carried out at low speeds. A sharp change in the geometry of the metal leads to the appearance of cracks (ruptures).
- You will have to not only select the power of the electric motor, but also the gear ratio of the gearbox. Plus, to mount the automation circuit with the installation of the appropriate elements (buttons, starter, and so on). All this greatly complicates the manufacture of the machine.
Conclusion - for a home forge, a snail is enough, with which you can bend metal products manually. Anyone who understands all the nuances of its design and understands at least something in electrical engineering will be able to independently install an electric drive on it.
Making a snail
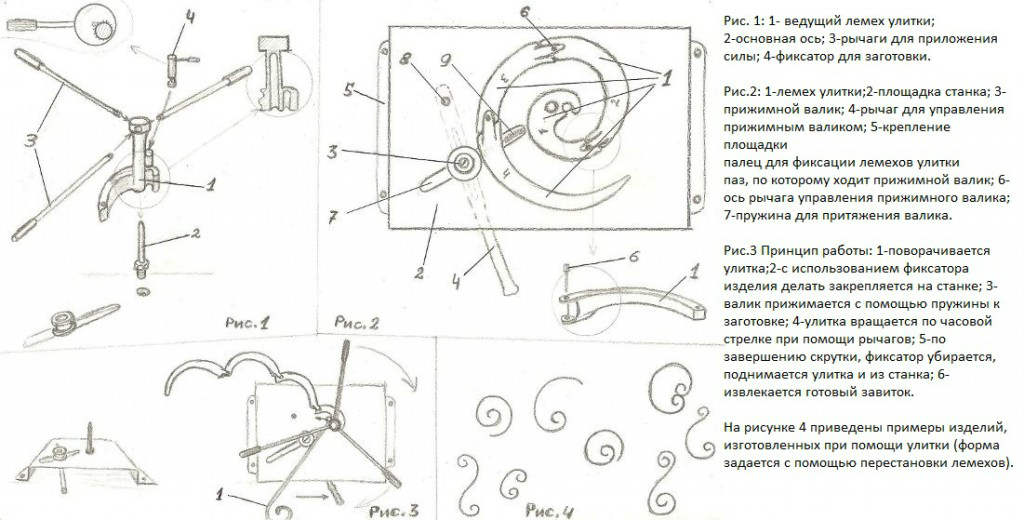
Several devices are shown in the figure. Approximately so (basically) it should turn out.
Assembling a snail with your own hands is one of the options for self-design, when it makes no sense to give recommendations indicating the exact parameters of all components. Here you need to focus on your own idea of \u200b\u200bwhat and how it will bend (radii, the number of turns of the spiral, and so on). But if the essence of the manufacturing process becomes clear, then the assembly itself will not cause difficulties.
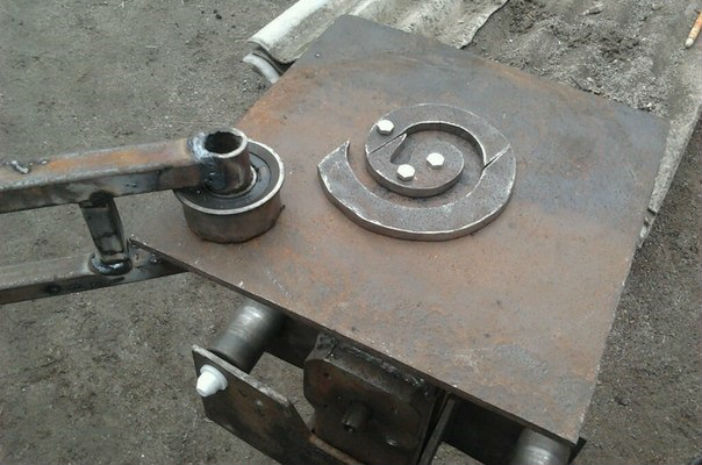
desktop device
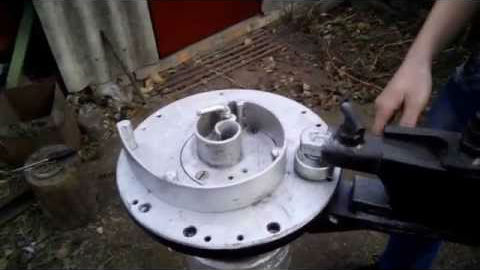
The cold forging process requires a lot of effort. If you already have a finished workbench, then you may have to strengthen it. When making a snail from scratch, the table frame is made only of metal - a channel, a corner, a thick-walled pipe.
It is clear that the countertop must also be metal. During the operation of the cochlea, it will be subjected to both static and dynamic loads. Therefore, an ordinary iron sheet is not suitable. Only a plate, and not less than 4 mm.
Marking and installation of "mounted" equipment
Perhaps the most creative stage of work. You can do everything with your own hands. But how, taking into account the prospect or limiting the production of the same type of samples?
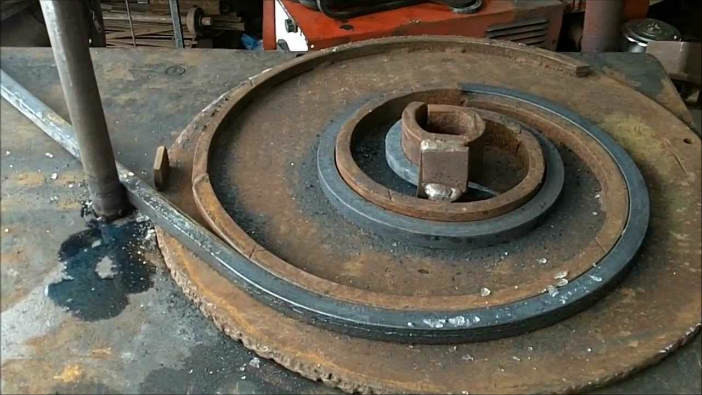
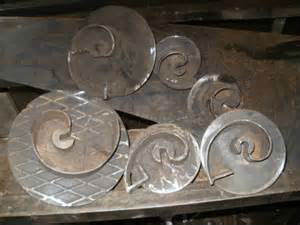
Option 1. The easiest. The meaning of the operation is that a spiral outline is drawn on the tabletop.
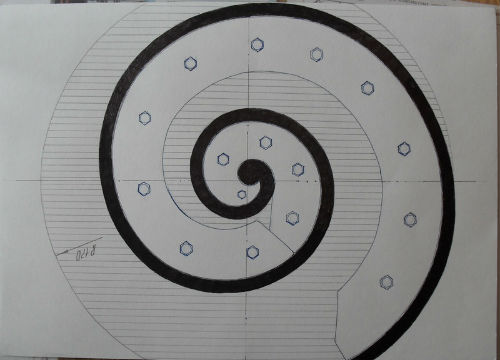
In fact, this is a sketch of future figured parts, for example, from a bar. After that, it is enough to cut out several segments from thick strip iron, bent along the radius. They are welded to the tabletop, and the bending mechanism is basically ready.
Someone will find this performance more attractive - with a solid strip.
But practice shows that it is more difficult to work with such a snail. For example, when removing a finished product from it, certain difficulties will arise.
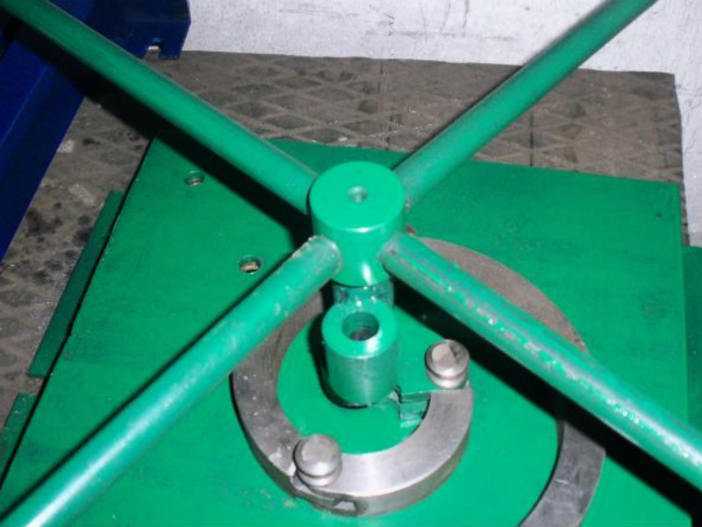
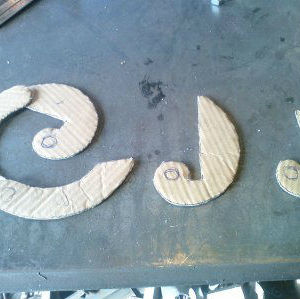
Option 2. The same, but several contours are drawn. Holes are drilled along each, in which threads are cut. It remains only to prepare templates for the stop segments. With their own hands they are made, as a rule, from thick cardboard or plywood.
Overlays are made from metal on them, in which, after the next marking, holes are also drilled, coinciding with the landing “nests” in the plate. This design will allow to organize the production of spiral blanks with different radii on one table. It will only be necessary, depending on the shape of the bend, to install the corresponding segments in certain places. Their fastening to the base is bolted. You can do it differently. Instead of such stops, put cylindrical ones.
For fixing, they are attracted by bolts (from the bottom of the plate) or are made immediately with legs (+ thread) and screwed into the table top. Much more comfortable with them. And if you have your own, then carving it with your own hands is a matter of a couple of hours.
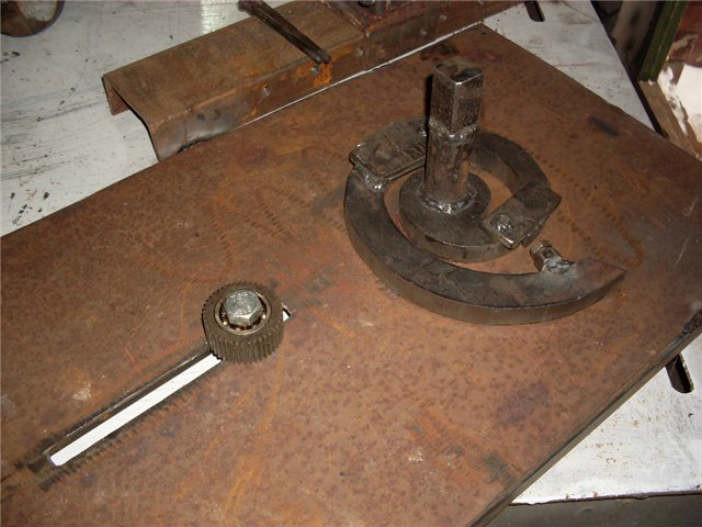
Option 3. Prepare several removable modules, which can be changed as needed.
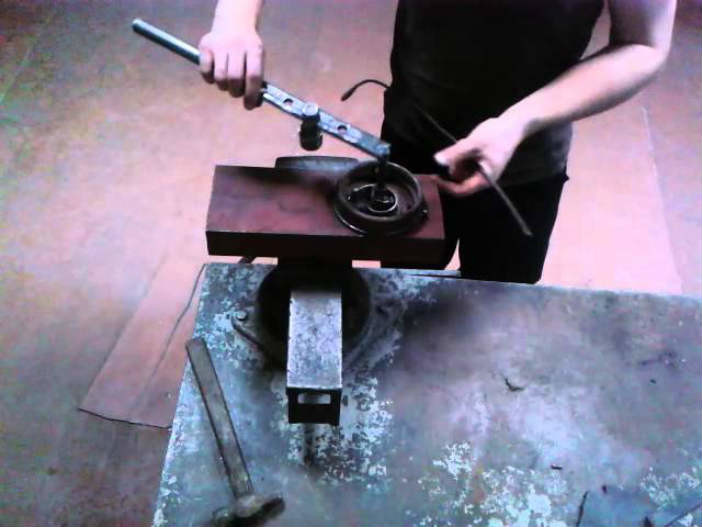
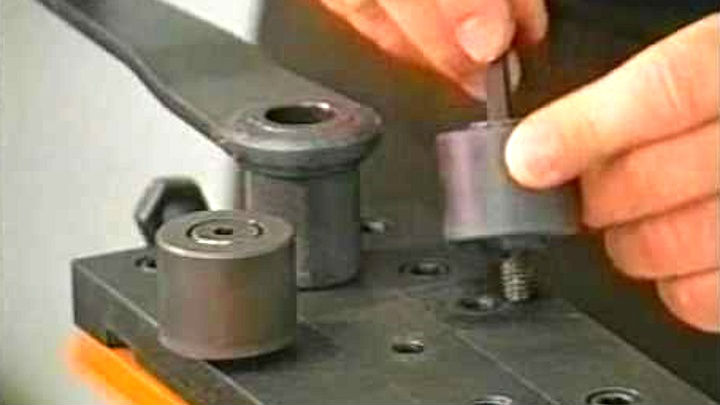
Snail assembly
A ploughshare is installed, levers are attached, a side stop. All this is clearly seen in the figures.
Everything that is in the barn (garage, in the attic) will go into action - trimming pipes, rods, corners, and the like. If the principle of the snail's operation is clear, then no more hints are required.
Health check
This is always implied, so no comments.
In principle, making a snail for cold forging is not so difficult. Moreover, there is no single standard for such devices. Someone will say - isn't it easier to buy a factory model? First, as already mentioned, you have to look for a long time. Secondly, it is not a fact that its capabilities will coincide with the fantasies of the master. Thirdly, you will have to lighten your wallet by about 19,000 (manual) and 62,000 (electric) rubles, at least.
Good luck in making a snail with your own hands!