Having a house in the village or a summer cottage, every spring you have to dig a garden. And if in the village this is done in one day, by ordering a tractor, then in the summer cottage everything is not so simple. After all, the entire territory of the dacha is surrounded by a fence, so it is almost impossible for a tractor to drive there.
Then you have to dig with your hands. However, not all summer residents are satisfied with this. You can, of course, buy a walk-behind tractor, but not everyone can afford this pleasure, and many summer residents dream of having their own mini tractor.
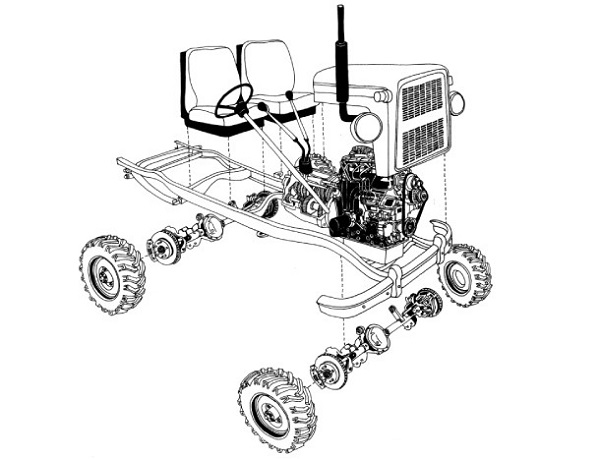
In order to make a mini tractor with your own hands, you need to start from the base, that is, the frame.
It is the most important part for our technical tool, since you will place the rest of the parts on it.
First of all, you should draw a detailed drawing of the frame.
For its manufacture, use lightweight metal channels. You connect them to each other using automatic or semi-automatic welding. Also note that the length and width of the frame should be proportional to the size of the future product.
You will assemble a minitractor on this basis. To do this, drill holes in the frame on all sides in order to secure various attachments.
Also, do not forget that you will also need to attach the footrests on both sides. You make them from an eight-millimeter steel sheet "St-3". You will also make a steering column from it.
To make the mini tractor more durable with your own hands, provide the segments that are located across with “kerchiefs”. In this case, use the same steel from which the steps were made.
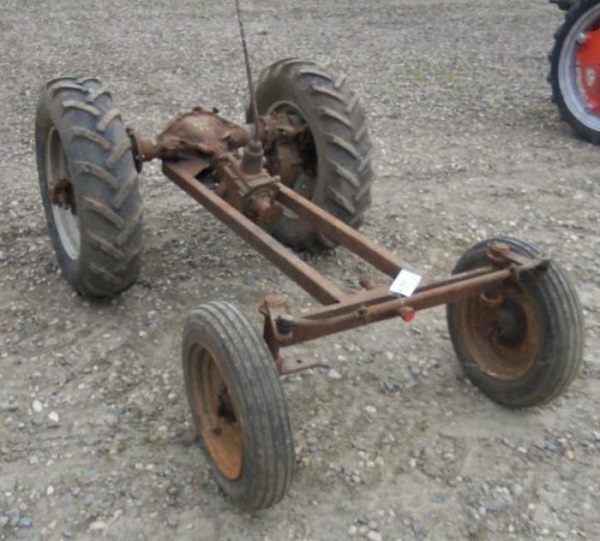
Now you weld bushings to the front of the base, which will serve as hinges for the bridge. You make them using sheet metal "St-3" two centimeters thick. Next, attach the front and rear axle.
Bridges need to be made with your own hands, using separately taken parts from a similar type of equipment (for example, you can use bridges taken from a Muscovite or twenty-fourth Volga for this purpose). However, in this situation, they will be too bulky and will not suit us in order to make a mini tractor with our own hands. So some details will have to be machined from scratch, be mentally prepared for this.
What components will you have to do with your own hands?
It is necessary to machine the rotary bushings and the supporting axle shafts. You will also need to make a cross beam. To do this, take a pipe that has a square section measuring sixty-five by sixty-five millimeters. The thickness of the metal should be five millimeters. Measure the desired length from this pipe and cut it off using a grinder or a metal file.

If you have not found a pipe of this size, you can make a cross beam with your own hands using metal corners. Using structural steel, make bushings in order to secure the axle shafts. You make a rotary mechanism using pieces of metal pipe. The pipe that is used for this should have a cross section of seventy by fourteen millimeters.
Cut off pieces from it, each of which should be one hundred and twenty millimeters long. The bearings will be located on the metal in specially made seats.
Then this part must be covered with a welded metal cover. In the middle, you weld an already finished part, which consists of two bearings and a cylindrical cage.
Some details about the rear axle
You can not do it yourself, but take it already prepared from the Volga. However, remember that the minitractor has a width less than the rear axle, so you must reduce the length of the axle to end up with eighty centimeters. To achieve this, remove the fixing stockings and cut off the rivets. Push the rest inward. You can disconnect the bridge and the gearbox housing using a sledgehammer. Do not forget to fix the first element using a special mandrel.
After these steps, you will be able to ensure a reliable connection with the reverse gearbox, which will completely eliminate the possibility of cardan breakage. And you can also not worry about how to install and balance counterweights, which will greatly speed up the manufacturing time of a mini tractor.
Fix the stockings that you shortened in the holes by cutting the M-12 thread and screwing the screws into it. Now fasten the resulting bridge to eight steel plates. You must weld them using M-10 bolts. Four bolts must be welded to each plate. After that, fix the frame using nuts and spars. Check the connections with spring washers. For this purpose, steel plates of the same size must be welded onto the bridge.
At the end, under the frame mount, install the required number of brackets. To make a hoist, the hoist housing shaft must be welded to the axle housing.
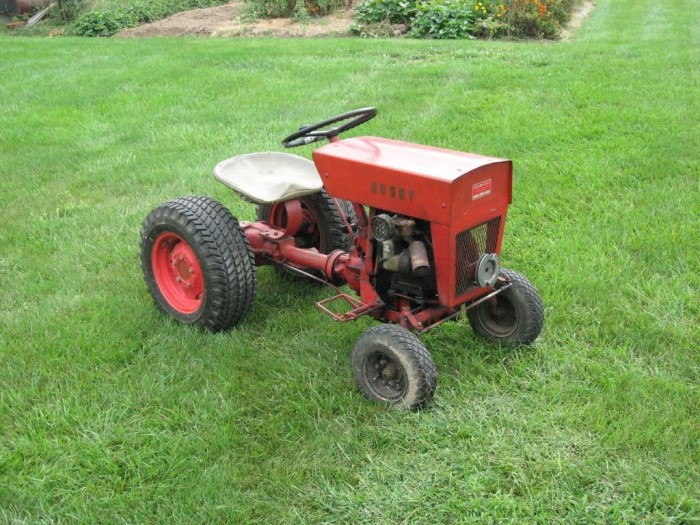
At the final stage, weld a chair to the tractor and paint all metal parts of the product with paint of any color. Do not forget to install a hitch on the back of the frame so that you can hitch the plow.
Second way
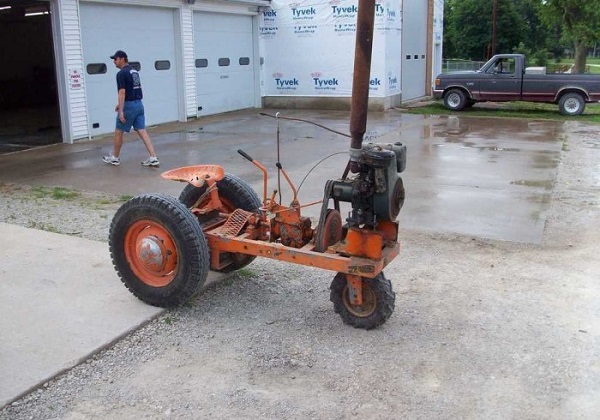
It is simpler than the first, but you must purchase a walk-behind tractor, and you can even use a Soviet-made Ural.
Now you need to remove the engine from it, this is the main traction device. All that remains can be used as spare parts.
You will also need a launcher and two bridges with wheels.
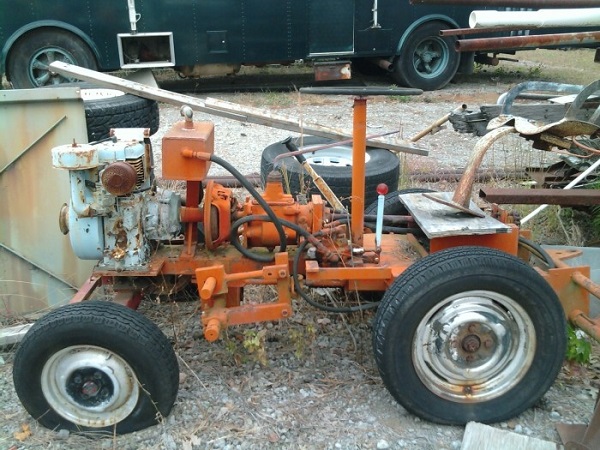
Now you are designing the kinematic system of the future mini tractor. In this case, it must be remembered that the traction force that comes from the motor is transmitted to the shaft base using a roller chain. In the same way, power is transferred to the drive wheels.
Band brakes are placed on the output shaft. Install the gearbox on the axle. The minitractor will be started using the starter pedal.
The assembly diagram is shown below.
Using steel pipes and corners, weld the frame. Do not forget that a fork will still be placed on it so that the equipment hitched to the tractor can turn.
As you can see, making such a useful technique with your own hands is not at all difficult, you just need to have some skills.