Working on a summer cottage or a small farm constantly requires a lot of effort on the part of the owner. Cultivation, hay, garbage, snow removal, delivery and fertilization into the soil. Doing this manually can be overwhelming.
A small tractor can make the task easier. In addition, making a mini tractor with your own hands is as easy as shelling pears if you have experience in working with machinery.
1 Benefits of a homemade mini tractor
It is quite simple to make the main components of a homemade mini tractor with your own hands. In addition, the cost of such a procedure, if the necessary parts are available, is much lower than buying a factory version.
Most often, the units are taken from old (broken) home appliances, and the remaining components are bought in addition. If the farm already has other small-sized equipment, for example, a walk-behind tractor, the task is simplified even more. Therefore, efficiency is the main advantage of homemade mini tractors.
Also, the advantages of such equipment include the ability to customize the dimensions and combine the nodes on your homemade mini tractor. Standard factory equipment excludes this possibility.
As for the shortcomings, here we can highlight:
- the difficulty of developing the correct drawing;
- maintained condition of most parts;
- problems in the functioning of the machine, in case of lack of skills in manufacturing.
2 What does a homemade mini tractor consist of?
The first thing to do before assembling any equipment is to determine what nodes it consists of. The simplest device of a small-sized tractor includes the following components:
- engine (a walk-behind tractor or scooter can act as an engine);
- a strong power frame on which all other units are mounted;
- hydraulic braking system;
- assembly with brake discs;
- chassis, including wheel axles and wheels (also a suspension or a mechanism that replaces it);
- a mechanism for attaching attachments with the possibility of lifting;
- steering column;
- comfortable chair for the operator;
- rear and front lights.
Each of the listed units should be assembled on the basis of a clear general drawing, so as not to disturb the proportions of the machine.
2.1 Which engine to choose?
As a power unit, you can select a variety of options. You can make a small tractor with a zeed engine. A single-cylinder four-stroke engine with a volume of 4.5 liters is quite suitable for cultivating land up to 2-3 hectares. Such an engine was originally designed for homemade cars, is very easy to maintain and can be easily found on the Internet.
If there is an old Cossack available, then the power unit from it is the best fit for a homemade tractor.
A car with a ZAZ engine has a capacity of up to 40-50 horsepower (depending on the type of engine). Moreover, if the transmission on the machine also works, it is installed on the frame along with the engine.
If you select the most optimal engine for a home-made tractor, then it is better to make a car with a ud 2 engine. Like the zid power unit, ud 2 was developed by the Ulyanovsk plant specifically for home-made machines for agricultural needs. The power of such an engine is only 4 liters. With. But for processing a small field it is quite enough. In addition, it is very easy to repair.
If the home craftsman has a walk-behind tractor, then the task is simplified even more. In this case, not only a power device is installed on a home-made mini tractor, but also a front axle with brakes and clutch, part of the frame and steering.
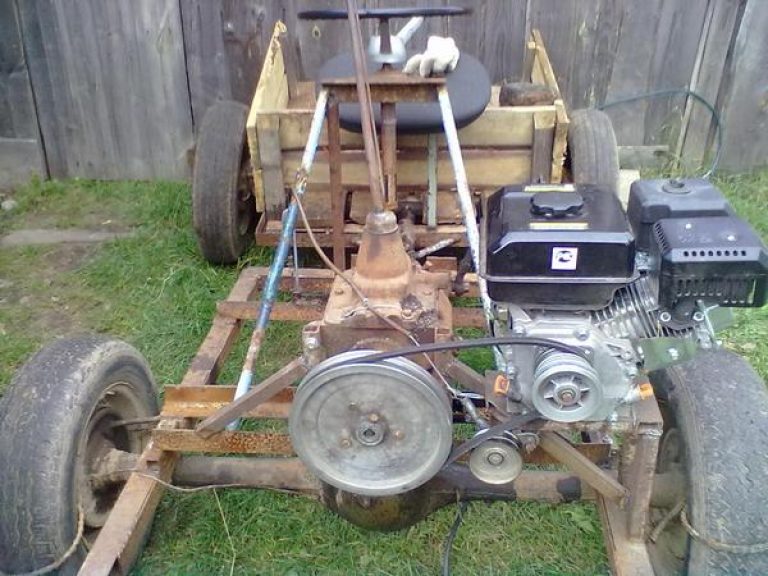
2.2 What to make the frame of a homemade mini tractor?
Before making a power frame, you need to decide on its type. Many craftsmen make tractors with a breaking frame. This type is an assembly of two halves connected by a movable link. The breakable frame reduces the turning radius, which makes it easier to work on small plots of land and near buildings.
To make such a frame, iron corners or channels marked 8 are needed. In this case, the front half frame should be slightly longer. Recommended dimensions - 900 by 360 mm. The back of the frame is assembled to a size of 680 by 360.
After assembling the frame, two pipes with a square cross section are welded across the front part. This is an engine mount. All other stands and corners are installed based on the intended design. It is desirable to weld the elements. Ordinary bolts may not withstand the load.
Two forks and a hinge will be used as a connection between the half-frames. For the hinge, bearings and a trunnion are taken from a Kamaz car. Such a cardan will allow the rear half to move not only in a horizontal, but also in a vertical position. At the back, a plate is welded to the frame for a hitch.
If it was decided to make a cast frame, two half-frames are welded with additional channels.
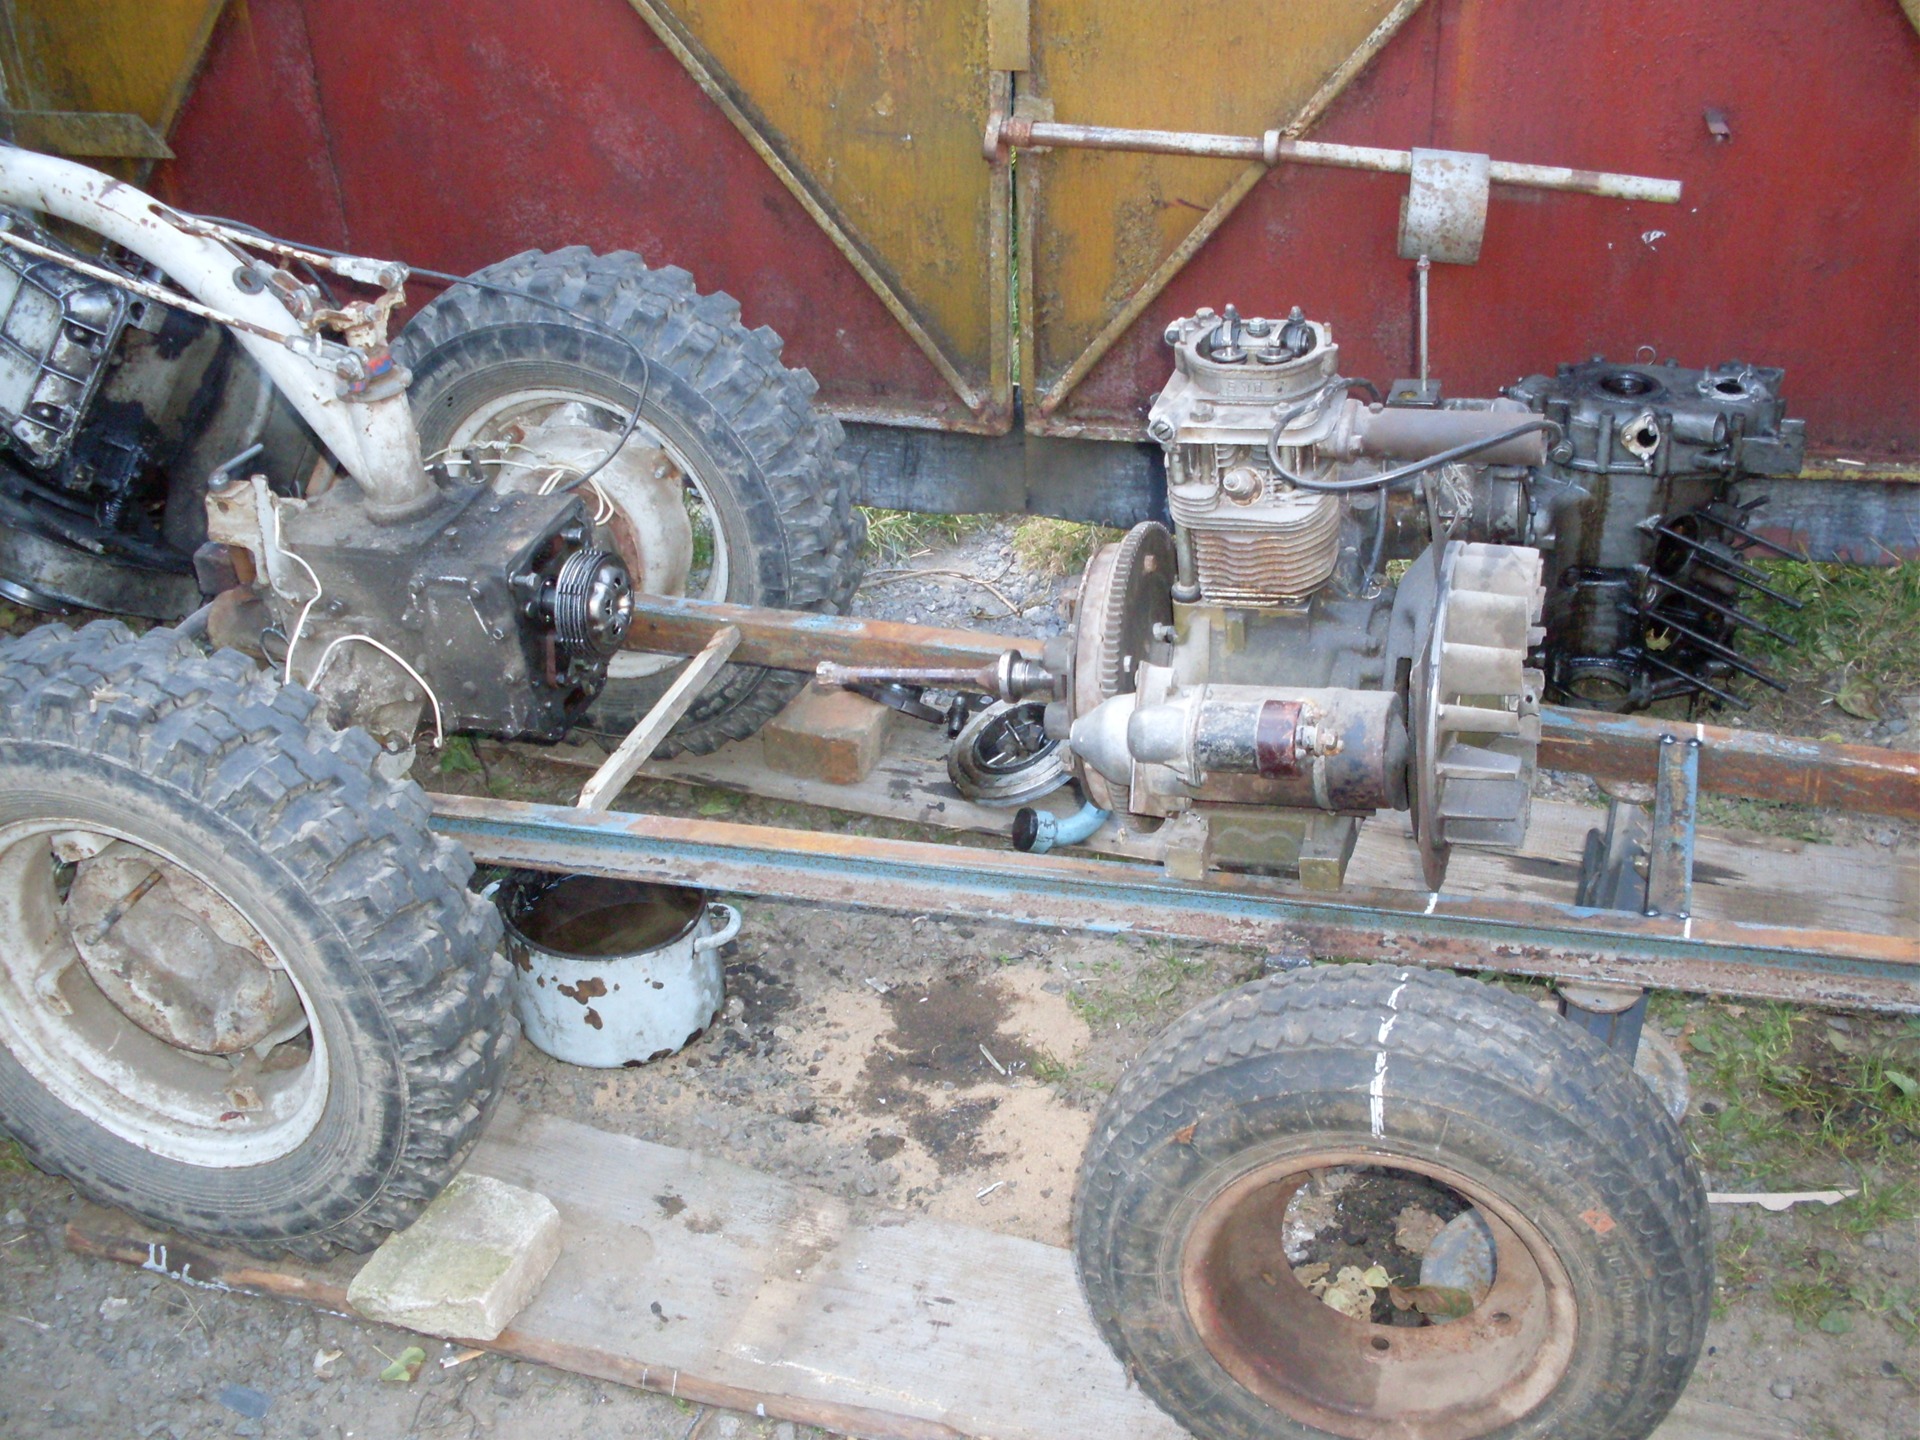
2.3 How to make a chassis for a mini tractor with your own hands?
First of all, bridges are being built. For their installation, vertical racks reinforced with corners are welded onto the frame. It is best if the homemade front beam on the minitractor will be of the same type rear. In this case, there will be no need to select a subordinate number, which is almost impossible without proper experience.
If the frame is not breaking, it will be easiest to take the running gear from the Zhiguli. Having slightly corrected it in size, we immediately install it on the frame. In this case, you do not have to separately look for a gearbox for a mini tractor. It is already installed on the rear axle.
If the frame is broken, it is better to use a different scheme. In this case, the front axle on a minitractor is best made from a cast rod, with a diameter of at least 50 mm. In the middle, with the help of a semi-cylindrical lining, a hinge is fixed, which will be responsible for the floating movements of the bridge on bumpy sections. At the edges of such a beam, ears for pivots are installed.
KAMAZ trunnions with axles on the hub are fixed on the ears with the help of pivots. Wheels fit on them accordingly.
If you wish, you can make hydraulics on a mini tractor with your own hands and at home. In this case, hydraulic motors are taken from any brand of machine. To install them on the frame, you will need additional pockets on the frame. You can make them with steel corners. The motors are fixed to the frame with strong bolts. Pockets with hydraulic motors are installed near the drive axle. Each motor is designed to turn one of the rear wheels.
To organize the exact direction and speed of rotation, a distributor from a Belarus tractor is installed above the axis. In front, next to the main engine, an oil tank is installed. It must maintain optimal pressure. A special bushing is installed in the middle of the system, which will be responsible for swinging the front axle. To drain the oil, a standard spool is fixed.
Hydraulics will also allow you to work with additional attachments, automating it.
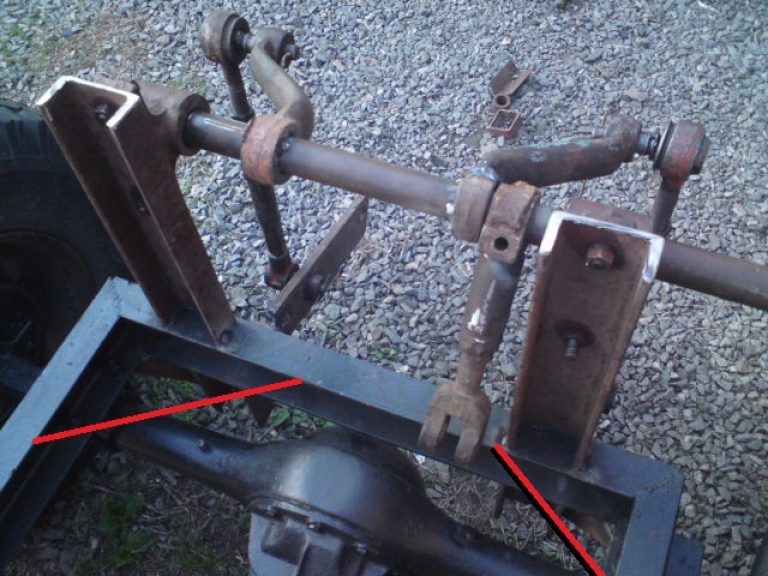
2.4
The hitch is used to connect with additional equipment. In addition, a special power take-off mechanism allows you to automate the operation of such equipment as a seeder or mower.
The most reliable option is a three-point homemade mini tractor hitch. It consists of a do-it-yourself hitch on a minitractor of two rods that can be taken from any car. The rods are attached to the plate prepared in advance on one side, and to the attachments on the other. The third attachment point will be additional traction and a hydraulic motor drive, which will transmit torque to the working parts of attachments.
In order for everything to move normally, it is better to fix a movable rod with a diameter of 40-50 mm on the plate, and then attach the hinge rods to it.
2.5 How to properly install the brakes and clutch
Brakes are installed on the rear drive wheels. The best option here would be to take the factory version from UAZ. Brake pads are mounted on discs, and control is output to the appropriate pedal inside the cab. If necessary, you can make the brake manual, under the lever.
If you make a clutch, then a standard belt type is suitable for a mini tractor. The easiest option is to take a ready-made mechanism. Suitable clutch with UAZ or Moskvich. With a small engine power, the belt traction of the walk-behind tractor will be enough. The tube that presses on the belt is attached to the frame with a spring that clings to an eyelet welded in the middle. The other end is welded to the pedal by means of a lever.
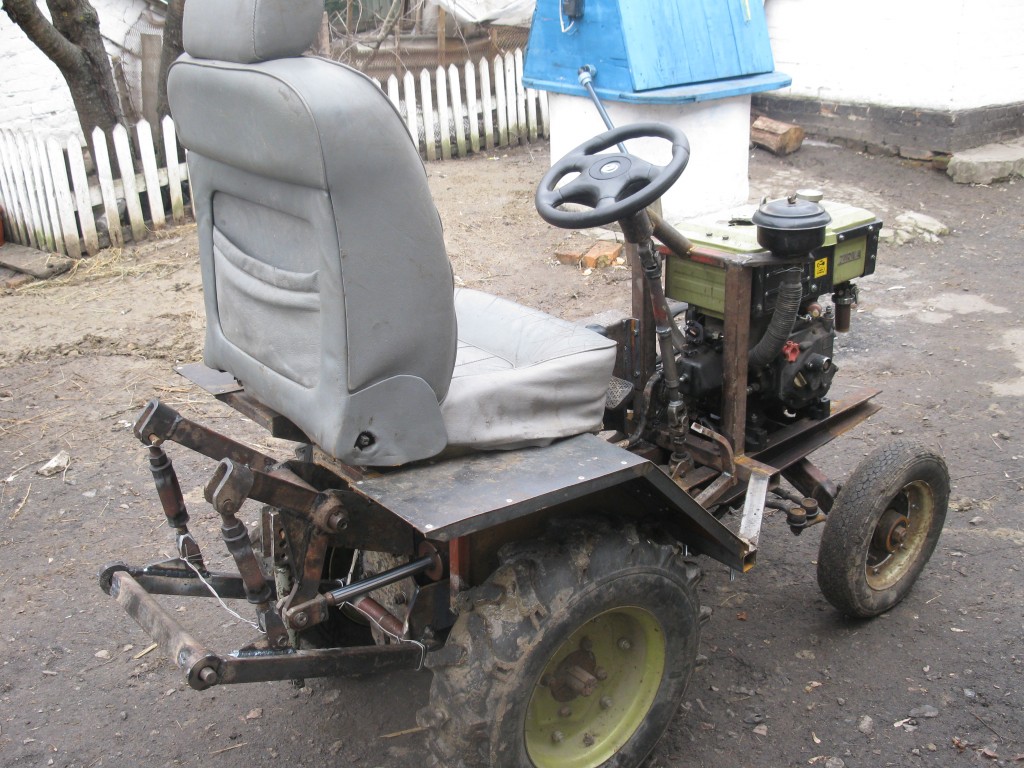
2.6 Steering column and driver's seat
The steering of a homemade mini tractor is best taken from Moskvich. The only feature of such a mechanism is that in the standard version it turns in the opposite direction. Therefore, instead of the Moskvich rods, the rods from the Zhiguli are installed, and the hubs from the Zaporozhets. A special steel lever, which is installed between the rods and the column, puts the system in the right direction.
As for the driver's seat, it is installed on a pair of vertical corners welded to the frame or on rectangular structures made of square pipes. To reduce vibrations during operation, it is also possible to install the seat on steel shock absorbers with additional fixation with rods.
For convenience, a home-made cabin for a minitractor is easily made from thin sheet steel or tin.