Paper is a versatile raw material that is used in a wide variety of areas of human life. In the work of many people take this material as a basis. It will be very interesting for both adults and children to find out what crafts can be made from paper.
Original paper products
It is not at all difficult to make beautiful paper crafts at home. A fair amount of all kinds of figures require the presence of sketched diagrams according to which the product is assembled. Armed with a pencil and a ruler, everyone can create a craft using a template. One has only to draw a diagram, and you can easily create pieces of furniture or gift boxes, for example.

Each interesting idea has instructions on how to make a craft. It is important to note that the dashed lines in the diagram are fold lines.

Photos of paper crafts, as well as detailed instructions and descriptions of the necessary materials and tools, can be found on the Internet. In our article, we offer some options for crafts of different levels of complexity.


For the little ones
From a very young age, children begin to show interest in paper. We invite parents to make a bright and beautiful bird together with their children. Your kid will be able to play with it or decorate the room.

Before starting work, you should prepare. You will need a bird template, cardboard, thin paper (square) and colored pencils or markers. Using this template, you cut out a bird. Then draw the beak, feathers and tail.

Wings are made from a thin square sheet of paper. To do this, it must be folded like an accordion, and then fixed in the body of the bird in a hole previously prepared.

It is important to remember that the cutting process must take place under the strict supervision of an adult. And do not forget to explain to the kid that after work all the tools should be put in their places.

Decorate the bird by sticking ribbons, sparkles or rhinestones on it.

Volumetric paintings
All paper crafts can be simple or complex. Applique is considered one of the simplest techniques for making paper crafts. This type of creativity is studied by children in the early stages of education.


Work algorithm
- Fold the napkin 4 times and fasten with a stapler in the middle. Cut corners to make a circle.
- Form a flower by severing the circle layer.
- Cut out some green leaves.
- Cut out the basket.
- Glue all the details onto a sheet of cardboard.

Please note that corrugated paper or foil can be used to make the basket.

Torn paper applique
Another way to applique without using scissors is to work with confetti or torn paper.

To work, you must have:
- glue;
- torn paper (or confetti) of different colors;
- cardboard for the base;
- pencil.

Work algorithm:

- We put an image on the cardboard.
- Smear the details of the image with glue one by one.
- Put pieces of paper or confetti on top of the glue.

If desired, the picture can be decorated with a frame made of any other materials, or inserted into a photo frame. Attach a loop on the back, and you can hang such a children's masterpiece on the wall.

Weaving
There are a huge variety of ways to learn how to make paper crafts using the weaving technique. This is a very original approach for creating an exclusive piece.

The simplest in this technique is considered to be weaving from strips in a checkerboard pattern. For those who are not looking for easy ways, work with paper tubes is suitable.

It is worth considering that the properties of the product will depend on the type of material you choose. You can work with:
- plain paper;
- newspaper;
- tape for cash registers;
- glossy magazines.


Thus, you get a durable and high-quality product. When the product is woven, you can decorate it as you wish. There are no restrictions here.


Origami
Origami is one of the most difficult techniques for working with paper. Next, we offer a master class on paper crafts using this technique. Let's make a chicken as an example.

To work on the product, you will need a square piece of tissue paper and pencils (black and red).

Work execution algorithm:
- Fold the paper diagonally.
- Expand.
- Bend into two equal parts
- Expand the left and right corners of the square.
- Bend these corners in the middle in such a way as to combine them and the result is a pentagon.
- Bend the top of the cone in the middle.
- Bend the same cone in the opposite direction, but so that a small corner remains outside the sheet, which will become a beak.
- Align the left and right edges of the product, but so that the beak is on the left side.
- Fold the upper right corner into the middle of the product.
- Bend the lower right corner, which consists of two sheets, outward. When making these movements, it is important to match the undersides. Also, at this time, you need to bring a small corner beyond the extreme left border. Thus, the legs are obtained.
- Turn a small corner-tail to the outside.
- Lower the beak a little.
- Draw the eyes with black pencil.
- Paint over the beak with a red pencil.

The magic of origami surprises and intrigues children. Having mastered the technique on your own, you can teach your child to make interesting new toys.

If you show your imagination, then you can make whatever you want out of paper. Your craft will be exclusive primarily because it is handmade. And it depends only on you how people will see it: color or black and white, flat or volumetric. In addition, now we have a choice of all kinds of raw materials for creativity and decor.

Photo of paper crafts


Crafts based on paper begin to be made even in kindergartens. This material is popular because it is easy to work with and, most importantly, interesting. For those who are interested in paper art, we suggest considering origami from paper for beginners, the easiest schemes.
What beginners need to create origami
The first thing you need is of course paper and your hands. But if you are determined to delve deeper into the art of origami, we recommend purchasing additional, useful tools.
Before looking at the origami paper theme for beginners, I would like to note that not only paper can be used to create masterpieces.
You may need:
- Glue. Use PVA or pencil glue. Adhesive components are practically not used in origami, but glue will add strength and decorative elements to the finished fake. Experienced origamists use a special spray adhesive. It makes it possible to combine two materials and creates interesting combinations of texture and colors.
- Coloring materials. Here we mean everything from pencils to paints. Due to such materials, you can use white paper in your work. Be careful with watercolors, overuse can ruin your craft.
- Scissors. Before work, it is better to take care of the presence of several not tight scissors with different lengths. The tips of such scissors must be sharp. If you plan to work with small items, prepare your manicure scissors. In our master classes, scissors are practically not needed, we will consider the easiest origami for beginners.
- A knife for stationery. It must be well sharpened. In some situations, this knife can replace scissors.
- Sharpened pencil. He will help to mark up the material.
Origami box with lid
If you urgently need a small box with a lid, then all you need to make it is two sheets of paper. We suggest you make an origami paper box for beginners.
The finished box is ideal for storing small items. Using special origami paper that has a drawing, you can create a beautiful wrapping for a small gift. The finished structure will be very simple, the bottom and the lid will not fall apart, so the box does not need to be tied with tape. For manufacturing you will need:
- two square sheets of paper (one should be shorter than the second sheet by a centimeter);
- basic knowledge of how to make origami from paper for beginners.
The beauty of making this box is that you don't need scissors, glue or tape. Everything is done quickly and without additional materials.
Getting started: 
- In our work, we use sheets with dimensions of 19 by 19 centimeters and 20 by 20 centimeters. Take a large sheet and fold two opposite corners. Iron the fold. Unfold the paper and fold the other corners. Expand again.
- Now add each corner to the center point. We get a square, iron the folds.
- We take the nearest side and bend it towards the center, carefully smooth the seam. We unfold the workpiece with the other side facing us and repeat the work. We repeat the action with the remaining sides.

- Expand the future craft. You should have a square in the center. This is the size of the future box, or rather, one of its parts.
- We take the sides, stretch them. Wrap the remaining bent two sides to the middle. Iron the seams. You should have noticed that the sides of the resulting shape are divided into four squares.

- Focusing on the outermost square, wrap the end of the figure so that you get a diagonal. We carry out work with the rest of the sides of the workpiece.
- If the work is done correctly, then in the central part of the product, there should be two squares, and paper on the sides in one layer.
- Rotate one of the corners towards you. Lift it up. Use your fingers to gently spread the central part of the workpiece. Wrap the corner inside the product. On the other side, you need to proceed by analogy with the first.

- Iron all folds. One part of the future box is ready. You can already use this part, but we are making a box that closes. Therefore, we take the second square, which is smaller, and carry out the same actions that we did with the first sheet of paper.
If you have coped with the manufacture of the second part of the box, then you have the bottom part. It can be covered with the lid we made earlier.
As you can see, the work is elementary. Such origami, made from paper according to schemes for a novice craft lover, can be of many benefits. You will be able to improve hand coordination, improve your skills in making paper crafts.
Choosing paper

The main rule by which you need to choose a material is strength. It doesn't matter if you will make origami paper crafts or it will be a box, durable paper will not tear. If the material is not dense, it will begin to tear and you will quickly get bored with this activity.
In addition to density, it is important that the work material holds the folds made.
Paper for modular crafts should be considered separately. Here, of course, it is better to dwell on the thin version, which will allow you to bend several layers at once.
Otherwise, choosing paper is not difficult:
- Office paper. This material is durable, does not slip during operation and is able to keep its shape well. This paper is ideal if you are making an origami plane out of paper.
- Multi-colored paper for children's work. Before using or purchasing, make sure it is sturdy enough and that there are enough colors in the set to complete the craft.
- Crumpled paper. It is not used to make animals or cars, but for, this option is ideal. Such material has ductility and strength.
- Gift wrapping paper. A great option for making bright crafts.
There is paper that is specifically used for origami. She is called kami. You can buy it in the departments for creativity. The paper can be decorated with patterns or colored in any shade. Another origami paper option is woshi. This material is created by hand.
We do not recommend using special paper right away. Practice with the simple crafts we'll talk about below using plain heavy paper.
Paper stories or origami paper for beginners
Folding origami figures will appeal to both young children and adults. If you are a beginner, we recommend starting with simple but very interesting figures. We invite you to consider our paper origami and clear diagrams for beginners.

The simplest crafts are animals folded from paper. For example, a gray or white mouse with a long tail and a curious nose.
Instructions: 

The mouse is ready, it remains only to finish drawing its antennae, nose and eyes. By the way, if you add a few more fairy-tale characters to the craft, you can make a good children's fairy tale teremok.
Volumetric paper cat
We continue to make crafts and now we will try to design origami felines. We have already considered detailed instructions for manufacturing This design option is no less interesting, but at the same time simple.
If you follow the simple tutorial below, you will have a voluminous kitty. For the first work, it is better to use ordinary office paper, in the future it is appropriate to take thick double-sided material. Let's get started:


Paper dog muzzle step by step
If you want the lightest folding craft patterns, then there is nothing easier than making a cute dog face.

We do it in steps:
- fold a triangle out of a square;
- iron the line and unfold the figure;
- focusing on the line obtained in the center, bend down the sides of the triangle;
- we start triangles both from above and from below.
The dog's muzzle is ready. Decorate your finished origami so that it looks like a real dog.
Origami fish
Making origami fish is very simple. In just a few minutes you can create a whole paper "aquarium". Consider several options for making fish.
Triangular fish
 (Step 1)
 This fish is not only simple to perform, but also very beautiful. This craft is interesting in that several fish can be folded according to one scheme, which will not be similar to each other. For manufacturing, take colored double-sided paper. How to make such a fish:

The fish is ready, draw the eyes and you can play with it.
gold fish
Who hasn't dreamed of catching a goldfish? Catching her is not so easy, but making origami is easy. Who knows, maybe she will fulfill your desire.
 (Step 1)
 Prepare the paper you need in color and get to work:

That's all. The wish-fulfilling fish is ready. Draw fins and eyes on it. Can add . Well, if we continue the fabulous theme, then you can not do without a ship with which you can catch a goldfish. in one of the articles earlier.
Simple origami plane
 Airplane scheme
 There are many schemes by which you can make an origami airplane out of paper. the site advises to start viewing the manufacture of airplanes, preferably with a simple and well-known model. Even if you know how to do it, repeating the design will help show your child the manufacturing process, and you will "warm up" your hands before more serious crafts.
We start to design a simple airplane:
- fold a sheet of paper vertically, then unfold it;
- we bend the corners located on top to the center focusing on the line obtained in the previous paragraph;
- fold the resulting corners again, make sure that the edges do not connect or intersect with each other on the center line;
- bend the sides from above to the bottom from each top;
- spread your wings.
The toy is ready, we trust a little designer to decorate the airplane.
Airplane that rotates

The next version of the airplane is not easy. After starting it spins, spins and picks up the air flow.
How to make such an origami paper airplane:
- take a square, bend it and unbend it to get a center line;
- we fold the upper corners according to the outlined line, the sides of the corners after folding should be aligned;
- lay the corners in the middle of the craft, and bend the upper part towards the center;
- gently bend the wings of the future aircraft inward;
- turn the workpiece sideways to you and fold it in half;
- fold the wings on each side.
The plane is ready. This product has one rule of thumb. The plane must be launched in an open area.
Besides:
- If the plane is launched over the ground. The product will begin to draw loops after launch.
- If the plane is launched upward. He will start to make circles.
It is better to launch such a product against the wind. Bend the wings if necessary.
Fighter aircraft
Now we are going to show you how to make a real paper fighter plane.

Follow the steps:
- take a sheet and bend the upper corners to the middle;
- by folding the sheet (as shown in the diagram) we outline the fold lines;
- fold the sheet along the marked lines, you should get a blank with a triangle lowered downward;
- bend the corner up, and pull the sides down;
- fold the figure in half;
- we spread the resulting wings and gently iron the lines on each side;
- carefully turn out the "nose" of the fighter;
- in the back you need to make two cuts, for better air flow, bend the cut parts.
The paper fighter is ready. Such an airplane does not need to be thrown up. It is better to launch the launch so that the model is parallel to the ground. You can run the finished structure slightly downward inclined.
Creative people sometimes do not find ideas of what can be made out of paper. Each thing is an amazing and attractive subject for viewing. Creations become decorations for the living room. As a rule, these are diverse compositions and figurines.
The basic material for them is paper. Unfortunately, in the experience of many, ventures are exhausted. We offer several of them. They are multifunctional, designed for both professionals and beginners.

First, let's clarify that doing it yourself is good not only because it takes up free time, but also develops fine motor skills. It also improves memory and creativity.

Simply put, creativity develops the right hemisphere of the brain. Moreover, the general state of health also improves: pains decrease: aching or migraine headaches, moral stress and fatigue dissipate. This is a good rest, which boosts self-esteem and mood. We offer to get down to business!


Materials
- Colored, white, corrugated paper. Get A4 size;
- Multi-colored cardboard;
- Scissors;
- Glue stick and PVA;
- Ruler (10-30 cm);
- If necessary, markers or pencils;
- If possible, select mini staplers to add originality to the product.

Purchase the necessary arsenal in office supply stores. Usually experienced creators have almost all things in the workshop.

Making bookmarks
Bookmarks are used to quickly read or study something. Of course, it is extremely pleasant to look at the attribute in the book, which is made with love by the reader. Let's look at a few ideas.

Heart shaped bookmark
- Use a square cut out of dense material as a base.
- Bend the workpiece from each of its edges to form a triangle.
- Fold each side up.
- Fold about 1 cm to form side triangles.

Corner bookmark
- Fold a square of paper in half vertically.
- Bend the side corners of the triangle up, return to the opposite position.
- Fold the top corner.
- Repeat the side manipulation. Tuck them into the fold.

The accessory is good for those who constantly lose everything. The bookmark will not subside, it is clearly fixed at the edge of the page.

Worm
- Print out a worm or snake pattern.
- Cover it with strips of excellent texture and shade.
- Make eyes or draw them.
- Punch a hole with a hole punch.
- Pass the tape. Attach it to the cover of your book.

So, you got acquainted with the design techniques for book accessories. Agree, they are much neater in comparison with a sheet torn from a notebook.

Volumetric decorations
The 3D method allows you to make products that will certainly attract the enthusiastic glances of guests.

So you can decorate the room with dignity:
- Garland;
- Wall panel;
- Hanging decorations.

The period of making the craft, in contrast to the monotonous and hefty boring one, will take longer: both several hours and 2-3 days.

However, capacious multifaceted gizmos look much more interesting, they are noticeable and attract attention. They are light enough to make.

Paper garlands
In total, you need two layers of blanks. They can be of various shapes: circles, stars. The main thing is to observe their symmetry in a vertical section.

Cut out similar figures from cardboard, which differs in density. Those that will be on top are better to decorate or make from decorative paper.


The entire manufacturing process consists in connecting 2 layers between each other. Hang the resulting figures on a ribbon. Use a hole punch for easy attachment.


Paper panel
The panel technique is not very complicated. It is suitable even for beginners.
- Decide on the shape of the details: butterflies, hearts. Choose symmetrical ones.
- Cut out decorative cardboard blanks.
- Fold the pieces vertically in half. Work the fold carefully, this is the place for future fastening.
- Use glue to secure the elements along the fold line.

Consider the fact that by gluing something to the wall with an adhesive liquid, you spoil the wallpaper forever. In case you are not ready for such a crucial step, place the details on a piece of paper of any convenient size (choose A4 or A3). Decorate the product with a beautiful frame or baguette. This way you can save the wallpaper.

Hanging decorations. Manufacturing method
The rosette is a worthy example of such a decoration. We can often meet her as a Christmas tree decoration for the New Year.


Technique of execution - origami:
- Divide the square into 2 equal rectangles. One of them is again in two parts.
- Make a fold line from each side of the shape.
- The result should be an accordion. If it doesn't work out, finish the job.
- Fold the blank in half to make it look like a fan.
- Also turn the squares into an accordion.
- Connect all the parts along their edges with a glue gun.

The decoration can be hung over a work table, or used as a toy over a crib. Follow the analogy.

Take the base 25x25, 15x15, 20x20 cm. Choose the length based on the intended dimensions. Remember to think about every step. Wrong action contributes to redoing the entire work.

The glowing garland can also be made by yourself. To do this, make holes in the center, insert bulbs into them.

Hang the garlands from the tree branches. It will look unusual and original.


In case of difficulty, refer to the Internet, where step-by-step diagrams and master classes are given.


There are many interesting ideas for hand-made crafts to choose from. Each of them can be personalized.

Paper needlework will be useful for both adults and children. After a while, the job will be very easy. The process will bring joy and pleasure.

We recommend teaching children to creative work from early childhood. It is at this stage of development that you can develop attentiveness and hard work in your baby. Don't forget to help him. Thus, you will be able to combine the pleasant and the useful.


Useful Tips
Paper crafts with children is a great way to spend your free time with your family.
Take care of various crafts with children, and everyone will be very happy, not only with the result, but also with the process itself.
Take advantage of our tips and ideasto improve your craft making skills and acquire new ones.
DIY paper crafts. Braided heart.

Such a beautiful heart is very easy to make. It can serve as both a decoration tool and a beautiful addition to a gift, especially if you made it for a loved one.
You will need:
2 sheets of A4 paper (colors: blue and red)
Scissors
Ruler
Pencil
1. Fold the sheets in half and cut them into 2 halves (the cut should be made perpendicular to the bend).
2. Take each half and make 2 or 3 cuts on the side of the bend.

3. Start weaving a paper heart.
Insert the blue stripe into the red and the red into the blue.
Alternate all the strips to the end.
Trim the ends to create a heart shape.

4. Glue a strip to the paper heart so you can hang it.
* The simplest version is a heart of two stripes on each leaf. The more cuts, the longer weaving, but the craft itself will look prettier and more interesting.

* You can put sweets, a postcard or another surprise in your heart.
Crafts from paper for children. Toys.

You'll need:
Old newspaper or paper
PVA glue
Paints (gouache)
1. Prepare a newspaper first and shred it. Children can help you with this, and such an activity will be interesting even for the smallest. Cutting a newspaper with scissors is not worth it.

2. Cover the mass of crumpled newspapers with hot water and let sit for a few minutes.
3. Now crush the paper pieces into a homogeneous mass. If you want to speed up the process, you can use a mixer.
4. Drain off excess water and squeeze out the stock. You should have a wad of wet newspaper that you can sculpt from.
5. To start sculpting from a lump, you must first make it elastic.
For this:
Prepare the glue and gradually start adding it to the mass, remembering to mix thoroughly
The process of adding glue and mixing must be continued until the mass begins to resemble plasticine.
* It should be noted that you do not need to overdo it with glue, so that the mass does not turn out to be very liquid.
6. Now you have the sculpting material. You can, for example, sculpt cars and airplanes for boys or utensils for dolls for girls.

7. After you have molded the desired toy, leave it to dry.
8. When the toy is dry, you can start painting it.
Crafts from colored paper. Cylinder hat.

You will need:
Colored cardboard (or colored thick paper)
Colored paper
Plates
PVA glue

1. Place a large plate on the paper and circle it. Cut out the circle.
2. Place a small plate in the middle and circle. Cut out the middle. It is advisable that the circumference of the small plate is approximately equal to the circumference of your head.
3. Prepare a large sheet of paper (or glue several small ones) and cut it out so that its circumference roughly matches the circumference of your head. Next, make a few cuts along the edges.

4. Roll the sheet into a tube, and glue.
5. Insert the pipe into the margins and attach it to the circle by folding the edges and gluing them.
6. Glue the small circle that you cut out earlier to the top of the hat (i.e. to the top of the tube).
How to make a paper craft. Apple with a worm.

You will need:
Colored paper
Scissors
Pencil

1. First you need to think about what color your apple will be (yellow, red or green).
2. When you have decided on the color, you need to crumple a sheet of newspaper into a tight lump, and then wrap it in a sheet of the color you have chosen.
* To prevent your apple from unrolling, apply glue to the exposed edges of the paper.
3. Prepare a small rectangular brown leaf and roll it into a tube to make an apple tail.
4. Prepare a green sheet of paper and fold it in half, then cut out the blanks for the apple leaf.
5. Use a pencil to mark the hole in the apple. After that, you can glue the ponytail and leaves.
6. Prepare black paper and crush 6-7 small balls out of which you will then make a worm. Make one balloon larger than the rest - this will be the head.
7. Start sticking the balls onto the apple. First, it is advisable to apply glue and wait a little, then press the balls.
Crafts from cardboard and paper. Magic castle.

This fairytale castle is made using cardboard and toilet paper cylinders. The author of this project is an Australian and a mother of two babies. She is the author of several books, the main theme of which is paper crafts.
You will need:
8 cardboard toilet paper cylinders
Cardboard box
4 straws
Colored cardboard
Scissors
Markers

1. Preparing the main building of the castle
Prepare a box and cut the top flaps from it. Next, cut the teeth of the lock along the perimeter.
2. Making towers
A paper cylinder (aka "tower") should be attached to the corner of the box so that it (the corner) is approximately in the middle.
Use a felt-tip pen to mark the places where the walls of your castle meet the edge of the "tower".
Make shallow cuts in the marked places - about 3cm.
Repeat the process for the other three towers of the castle.

3. We attach flags to the towers
Prepare colored cardboard and cut triangles out of it. Next, glue the triangles to the straws using scotch tape. After that, glue (also using tape) the straws to the towers.
4. We make windows and doors
For windows and doors, you need paint - just paint windows and doors on colored cardboard and glue them to the front of the castle (you can use glue or tape).
5. Green surroundings
Prepare a sheet of green cardboard and draw 4 tree crowns on it. Take 4 loose toilet paper cardboard cylinders and make two cuts - opposite each other, then insert the crowns into the trunks.
That's all!
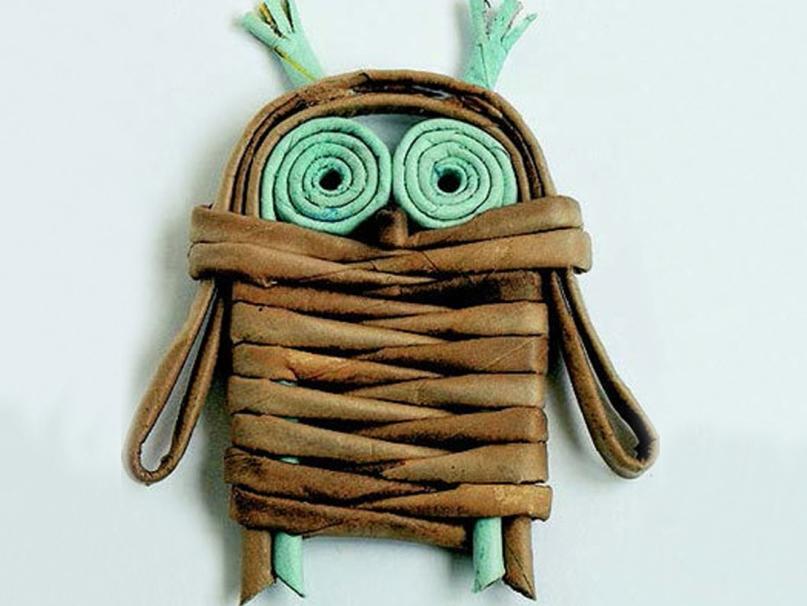
DIY paper crafts for children. Owl family.

All you need is a cardboard base for paper towels or toilet paper and paint.
1. First, paint each cylinder in its own unique color. Leave to dry after painting.

2. Bend the top of each piece as shown in the image to create owl ears.

3. You can draw or glue the eyes on plastic blanks.
4. Cut out the wings and beak from paper of a different color, which you then glue to the body of the owl.

Paper crafts (diagrams). Snake.

Using the "paper accordion" method, you can make such a cute snake.
1. Prepare a piece of paper and cut two strips of equal length.
2. Fold these strips into a shape resembling the Latin letter L.
3. Begin folding one strip on top of the other. In the end, you should have an elastic, elongated accordion.
4. Draw a funny snake face on colored cardboard and cut it out.
5. Stick the muzzle onto the end of the paper accordion.
Each of us probably already made something out of paper with our own hands, for example, a mouse on a string for a kitten or a flower for mom on March 8th. Now you can go to the Internet and ... oh, how many things! Here you can find funny animals, mysterious birds, fabulous flowers, and unusual snowflakes…. You can't count everything! How to figure out all this and what paper crafts to choose for repetition?
We tried to demonstrate various types of paper crafts and divided them into groups according to appearance, purpose, manufacturing method and complexity. Moreover, we have made the most attractive and uncomplicated handicrafts and prepared available master classes.
Cut out and glue colored appliques from strips, circles and torn paper
Before doing anything, you need to become familiar with what others have already done. Of course, we will follow this path, observing the principle: from simple to complex.

It is quite simple to make these funny flat applications: first you need to draw images of individual elements with a pencil on colored paper, then cut them out with scissors and stick them in turn on a regular album sheet. To maintain the proportions, you should first make the largest piece of the craft, and then apply it to sheets of a different color in order to draw other elements.
You can do it differently: first, depict the entire craft on white paper, and then cut out individual parts from it, apply them to a colored sheet and outline with a pencil. The most affordable flat applications can be made by babies from the 2nd to the 4th grade.

These original flat appliqués are interesting because they are made of paper scraps. When repeating, it is only important to observe the proportions of the diameters of individual elements. Let's learn how to make these using the example of a squirrel.

We need the following materials and tools:

Now you need to prepare the following circles:


We glue the blanks to the base in the following sequence:
- yellow segment of the upper leg;
- brown details, that is, the torso and ears;
- now the second yellow paw, tail and muzzle;
- hind leg, eyes and nose;
- It remains to paint on the mouth of the animal with a black marker - and the squirrel is ready!

Amazing crafts are made from pieces of torn paper! To make them, you must first apply the contours of the drawing with a pencil, and then glue the torn pieces of the required color.

In this way, you can really get a variety of plots. It is important not only to accurately apply the original drawing, but also to choose the right color of the paper and the size of the pieces. This makes very accessible and effective images possible.

This quick tutorial demonstrates how to craft an autumn tree with falling leaves. It's not at all scary if the tree is not very natural, and the leaves are glued unevenly. The main thing is that the result is impressive, even if a child gets down to business.

Charming crafts are made from strips of paper. Many of them can be made without the use of glue, using weaving.

To do this, holes are cut in the one-color applique, into which multi-colored stripes are inserted. It is possible to use a stapler to fix individual elements. The slots are made with a clerical knife on a metal ruler, and all work is done on a solid, even base.
As an example, let's make a beautiful fish from stripes. We need the following materials and tools:
- a4 paper in two colors;
- ruler;
- glue;
- pencil;
- scissors;
- pattern.
We collect the fish in stages:

The fish can be made as two-color or one-color. If we hang fish of various colors with the help of threads, then we will find ourselves in the Red Sea.
Schemes of simple and complex volumetric crafts for beginners and experienced
Of course, spatial forms provide great opportunities for making paper crafts. Children successfully create funny, bright and funny figures of this type with their own hands.

Again before us are strips of colored paper, but now they form spatial figures. The stripes can be glued to a flat base and complemented with a pattern.

Undoubtedly, voluminous crafts are somewhat more complicated than flat applications, but there are quite simple and successful examples. So, fish scales, parrot plumage and lion's mane are very successfully imitated by this method.
Let's learn how to make applique strips using the example of a hedgehog. We need the following materials and tools:
- yellow and brown paper;
- a4 white paper;
- ruler;
- glue;
- pencil;
- scissors;
- black marker.
The sequence of actions is available to schoolchildren of approximately 2-4 grades:

Three-dimensional figures of animals can be made in various ways. So, an ordinary cone perfectly imitates a chanterelle, and paper cylinders turn into elephants.
It is important to choose the right shape of the constituent parts, and then you get masterpieces: a bright humpbacked bug, fish with cheerful tails, graceful swans or bunnies with shifted legs.
Let's make a bright fish together. You will need a colored sheet, glue, pencil, black marker and scissors:


A peacock with a gorgeous tail is especially successful! The fact is that paper folded like an accordion holds its shape well in one of the directions, which makes it easier to create spatial figures. Bright fish from the Red Sea, temperamental Spanish dancers and nimble hedgehogs from our forest are made of paper folded like an accordion.

As you can see, suns, mushrooms, fox cubs, and Russian beauties are obtained no less successfully using the same method. Let's make a beautiful girl together. You will need A4 cardboard, white, yellow, beige and blue paper, glue, pencil, red and black markers and scissors. It's very good if you find eyes, flowers and beads from the children's creativity kit:


Specialty parchment or corrugated paper already has a wavy structure and does not need to be folded like an accordion. Original children's crafts are made from such material, but flowers are obtained especially well from corrugated paper, which we will demonstrate below.

Wonderful applications can be really made from napkins, and torn and wrinkled. Each lump will have to be fixed with glue and you will get a colorful mosaic.

As you can see, this method can be used to depict literally any subject: from bugs and butterflies to a natural landscape. To create a good picture, you need to correctly draw the contours of the image on a flat sheet, choose the colors well and be ready for painstaking work.
Let's learn how to make napkin appliques using the example of an apple. You will need red napkins, green paper, cardboard, glue, pencil and scissors:

Volumetric paper appliques turn into works of art if they are executed competently and with taste. Any of the images shown in the photo can take its rightful place in the house as a picture.
Obviously, we have some pretty cool crafts in front of us, the manufacture of which will require some experience. It is difficult to take your eyes off such work, but the painstaking work will be appreciated by relatives and friends.
Original products and things made of colored paper with practically no glue in various techniques
Handicraft paperwork is widespread in Japanese culture. Accordingly, many of the original techniques for working with colored paper are named in the language of that country.

These paper animals are made using origami technique. Crafts have original shapes and seem very complex. However, if there is a template, assembly diagram and description of such animals, schoolchildren can repeat all this.

These photos showcase simpler crafts that students in 3rd, 4th, or 5th grade can do. Most of them can be made without the use of glue.
It is interesting to make a movable origami toy - a frog that can jump. For this we need green paper. It is easier to make such a craft using the attached video.

The photo shows crafts made from pre-prepared colored paper modules. Products assembled using the modular origami technique amaze the imagination with their texture and shapes.

The modules come in various sizes, and it is really possible to assemble almost everything from them. Individual elements of the craft are fastened without the use of glue, but it is often used in an effort to provide the necessary structural strength.

To try the modular origami technique, let's make a small flower or an asterisk. We need paper of any two colors, we will use yellow and pink colors:
- We need to make modules from sheets of paper, for this we need to divide a colored A4 sheet into 16 identical rectangles.
- Take a rectangle and fold it in half horizontally.

- Next, fold the workpiece in half vertically, and then immediately unbend it.
- We fold the upper corners of the part to the vertical bending line.
- Now we need to turn our workpiece over.
- We bend the parts protruding from below.

- Bend the parts that look out at the edges again.
- We fold the part vertically and get the module.
- For the craft, we need 10 modules for the core, in our case they are pink, and 45 modules for the petals, we have them in yellow.
- We start making a flower from its core. Place two pink modules together.

- We fasten them using another module, into which they must fit tightly.
- We attach another module from the edge to an existing workpiece.
- We also attach it with another module.
- In the same way, we dock another module on the side and attach it.

- We repeat the previous step, now our very first and very last modules are in contact.
- We put one more module on the two extreme ones, connecting them.
- Now let's make a petal. To do this, place two yellow modules next to each other.
- We fasten them with another.

- We attach one module to the left and one to the right in the outermost flap of the second row modules.
- In the same way, we add two more modules on each side. The petal is ready!
- We will need 5 such parts.
- Now you can start connecting the parts. We take the core and put the extreme modules of the petal on it, as shown in the photo.

- Do the same with the rest of the petals and align them.
- We have such a flower!

Crafts using the kusudama technique are also assembled from the same type of modules, but in this case they are glued together. The constituent elements can have a wide variety of designs, providing a variety of finished products.

Best of all, using the kusudama technology, multi-colored balls of a fantastic structure, as well as flowers, are obtained. Let's learn how to make a kusudama flower ball. You will need orange sheets of paper, glue and scissors:


The photo shows samples of a relatively new technology for making paper crafts called papercraft. ("Paper" is not about dad, but about paper. "Kraft" is power, so you can talk about dad.)

Using the papercraft technique, it is possible to make wonderful volumetric figures of animals of a special style. Probably, it is not easy to develop such a craft, but it is quite possible to cut it according to a template and glue it together. 
Let's make a funny dog \u200b\u200busing this technology. In this case, it is allowed to make a template in two ways: either cut it out of white cardboard and then paint it, or make it from beige cardboard and then glue the colored paper parts. A combined option is also possible.

The template can be pre-printed or transferred by cells. Next, the figure is glued together in places unpainted in the image. While the glue dries, it is better to fix the craft with paper clips and money rubber bands.

Another Japanese word - kirigami reminds us of a fairy tale from the national theater of this country. A wide variety of crafts and subjects are possible.

Interesting are the "open books" in the kirigami technique with a voluminous plot. Of course, making such crafts requires a certain amount of experience.

We will make a fairly simple lawn with green grass and flowers in the style of kirigami. Such a craft can be rolled up like a book and carried away in a backpack, and then unfolded again.
We need the following things: cardboard, colored paper, scissors, a ruler, a pencil and glue:

Interesting homemade products from newspaper and magazine tubes, kraft paper
When you first see a craft made from newspaper or magazine tubes, you do not immediately understand what they are made of. Meanwhile, such products have good strength and are suitable for practical use in everyday life, so that they can be safely used as gifts.

The color and color of the paper, its quality and density matter: in one case, a color magazine is suitable, in another version, a newspaper is used.

Wrapping or kraft paper is often used. Its brown color is perfect for many crafts. In other cases, the wrapping paper is dyed.
Consider the process of making a small owl from newspaper tubes. We need the following things: newspaper, glue, building primer and color scheme, needles with a diameter of 1.5-3mm, scissors and clothespins. For weaving, we need seven tubes 30 cm long - five brown and two green:

 As you can see, kraft paper does not need to be rolled up. From it, as well as from packaging bags, it is possible to make, among other things, original and simple children's crafts.
It is easy to make a colorful autumn tree from a regular gray bag. In addition to the package, you will need glue, scissors, yellow and red paper:

Templates of cool kids toys and cardboard houses

Cardboard provides special opportunities for making crafts for children. They can be used to make large toys, using which you can hide in a house, growl in a bulldozer or purr in an airplane. Old cardboard boxes are perfect for this.

A cardboard house is very popular and can be made in a variety of ways, including for a cat. For the assembly of such structures, a special glue gun or adhesive tape is very convenient to use.

As follows from the photo, both fairly simple children's crafts and designer jewelry are possible from cardboard. Obviously, repeating this yourself is quite realistic.
Let's build a cardboard house for children. You will need the following things: a large corrugated box, a stationery knife and scotch tape:

Cool paper decorations for interiors and everyday life
Both professionals and amateurs have developed a considerable number of crafts for interior decoration and useful in everyday life. It is possible to do whatever you want: we look together and evaluate.

Let's start with the simplest children's applications that serve as bookmarks for books. Several versions are possible.

For example, origami bookmarks can be made without glue. In this case, design paper with a pattern is well suited.
Let's make the simplest origami bookmark:

This is how our bookmark looks on the book page. Holds up well.

Colorful fish, bats, cranes and butterflies will serve as a worthy exclusive decoration for any home. Perhaps this kind of work can be done with the whole family together.

In nature, butterflies strive for light, which can be depicted around a chandelier in an apartment. Flowers for decorating the walls of housing can be used in different ways.

For interior decoration, literally any of the techniques we have considered can be used, it is only important to give free rein to imagination. DIY paper jewelry can be made in accordance with the illustration, which is self-explanatory.

Paper snowflakes are a classic of the genre. They are cut out by both adults and children, both at home and at work and at school.
Volumetric snowflakes are especially lovely. Their complexity is seeming, small children do so easily.

Let's go back to decorating the interior, now for the New Year. Crafts from colored paper in this case are especially appropriate, since their bright unusualness is especially good in combination with cheapness and short service life.

Unusual paper flowers can be made in different ways.
Undoubtedly, flowers from a wide variety of paper have a special place. Let's evaluate the most common technologies for their manufacture.

The most simple ones are the very applications with which we began our story. For many, this is the first gift for mom on March 8, made on their own.

Unusual 3D handmade flowers, of course, are more difficult. But there is the possibility of creating a real work of art.

One of the options is flowers using the quilling technique. A lot of work will have to be done on such creations, but the result is clearly worth it.

In the photo in front of us are the already mentioned strips of paper. Certain types of flowers from such material are obtained as real.

We keep our promise to introduce corrugated paper flowers. Obviously, this material is better suited for their imitation than anyone else. Both individual flowers and bouquets are very similar in appearance to their natural counterparts.
DIY paper toys
A variety of things are made from ordinary paper! All homemade products are definitely not counted.

Before us is a paper machine that shoots the same bullets. To make a toy, you should use the article material
A paper cap? Who didn’t do it! In the article Create for health and about the rules of safe work, read ...
Safety rules for working with glue and scissors for children and adults
Scissors and glue, and especially a clerical knife, can cause very unpleasant injuries and consequences. We will very briefly list the circumstances that should be taken into account by both children and the adults responsible for them:
- scissors for children should have rounded ends;
- they should be well sharpened and adjusted;
- no need to play with scissors or a knife, swing them around, bring them closer to the face;
- give the scissors to a friend with the rings in front, put them in the closed position while working with the rings; (5 appreciated at 4,60 of 5 )