After acquiring a suburban area for a summer residence, the question of how to build a country house with your own hands necessarily becomes relevant. Well, to build it yourself is quite possible, unless, of course, a huge "palace" is conceived, requiring the involvement of construction equipment and a team of professionals.
Usually compact buildings are chosen for giving, but, nevertheless, the house should have everything you need to rest - rooms, kitchen, veranda. The latter will become a favorite place for the evening pastime all family. It is very important to make the country house cozy and comfortable, so you need to think over all the nuances of its arrangement.
The optimal material for a summer cottage is wood, and the principle of construction is a frame structure.
Of course, the first thing that will need to be done is to decide on the place and size of the building, draw up a project, and plan further work.
Proe kt of a small country house
The size of the future house largely depends on the area of \u200b\u200bthe summer cottage, the number of family members and the material capabilities of the owners. If you correctly plan, draw up a successful project and choose an inexpensive but high-quality material for construction, you can save space, money and time.
 In any case, the first steps are drafting
 Most often, a country house has a size of 5.0 × 6.0 or 4.0 × 6.0 m. Buildings of a larger area are erected much less frequently, and, mainly, in those cases when they are planned to be operated all year round. But this will, rather, not be a country house, but a full-fledged country house.
The layout of the location of the house may have to be carried out on the basis of the requirements that may be established by the board of the gardening partnership, therefore, when purchasing, you need to find out about such nuances in advance. Most often, the following distances are required:
- The house should be installed at a distance of 3 meters from the border of the neighboring plot, and from the fence that separates the plot from the general passage (street) - 5 meters.
- In order to ensure fire safety, a stone house is placed at a distance of at least six meters from another stone structure, and ten meters from a wooden one. If the house is wooden, then it should be installed at a distance of at least 15 meters from another wooden structure.
- So that the house does not block neighboring buildings from sunlight, if it is placed on the east, south or west side of the site, it is located at a distance from another residential building, at least equal to its height.
Usually, the highest is chosen for the installation of a country house place on the site in which water will not collect when snow melts or from heavy rains. The increased humidity under the house will never benefit any building material, but it will always negatively affect the overall strength and durability of the structure.
Most often, the following technologies for its construction are chosen for the construction of country houses: frame-panel construction, log cabins, walls made of blocks or bricks.
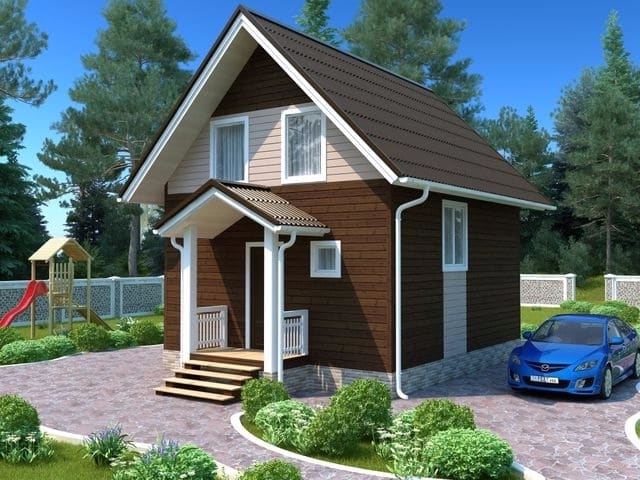
For summer cottages, projects of one-story houses with closed or open verandas or terraces are mainly chosen. Often the building has an attic space used for storing garden tools and other things that are seemingly unnecessary in everyday life, but which can always come in handy in the country. However, it also happens that in some projects the attic floor beams are absent altogether, and then the roof slopes also play the role of a ceiling.

If the family is large, and the area of \u200b\u200bthe plot is not as large as we would like, then you can plan a two-story house that occupies very little space at the base. In this case, the first floor can be used as a living room, terrace and kitchen, and on the second floor, cozy sleeping places for the whole family can be arranged.

Not at all necessary to build a full-fledged second floor in a dacha structure, since the attic superstructure can also perfectly fulfill its role. Having finished it with natural materials, you can create a wonderful healthy country atmosphere there.
Country houses are mainly used in the warm season, from the arrival of spring to autumn. Therefore, they do not require reinforced insulation of walls and roofs, but devices for heating the premises should still be provided in case of cold nights or a drop in temperature in unstable weather. Usually, electrical appliances are used as heaters, for example, convectors or infrared film radiators, but sometimes the owners even prefer to install fireplaces or cast iron heating and cooking stoves.
By the way, if the construction of a real fireplace or brick stove is planned, then they must be included in the project being prepared.
There are also ready-made options for country houses, sold in complete disassembled form, which you just need to deliver to the site and assemble. Any such set of parts must be accompanied by detailed instructions, which set out the procedure for carrying out work, basic technological methods and connection diagrams of individual elements and assemblies.

For the landlord who has basic construction skills, it will not be difficult to assemble such a country house on your own. The main advantage of this option is that often the kit already includes everything necessary for the electrical network of the building, for its ventilation system, and even for the installation of a water supply system.
Video: a small, neat country house that lives up to its name
What type of house to choose?
Having decided on the approximate plan of the future house, you need to choose the material for its construction. This choice will determine not only the appearance of the building itself, but also the comfort of staying in it, as well as the costs of its construction.
- The traditional material for a country house is wood, which will create a favorable microclimate in it, filling it with forest scents. A wooden house can be erected in a frame way, from a bar or logs. The disadvantage of wooden buildings is the high fire hazard of the material.

However, wooden houses have always been built, and many of them have stood for centuries. Today, there are special fire retardant impregnations on sale, which significantly reduce the risk of fire in wooden buildings. And in general - the most important thing here is not the material, but the human factor - it is the people's neglect of the elementary fire safety requirements that in the overwhelming majority of cases causes a fire.
- The construction of a brick structure will cost much more, but it can be called a full-fledged house, which can be used not only in the summer, but also, if necessary, in the winter, if you install a stove in it. Brick buildings are much less susceptible to fire and, with high-quality masonry, will last a very long time. Their disadvantages can be called a more complex and time-consuming construction process that requires special skills, and the high price of materials.

- Very often, different materials are used when building a country house. For example, a house is being built from wood, but on a foundation of concrete, bricks or blocks.

This option can be called optimal, since a foundation made of moisture-resistant materials will create optimal conditions for the construction of walls made of wood, thus it will become a reliable foundation for the house.
It is this last option that is worth considering, since it is the most popular of all types of country houses.
Stages of construction of a country house
Materials for building a country house
If you do not want to mess with the calculations, then it is better to purchase a prefabricated ready-made model of a house with a certain area, for which you will only need to prepare a place.
In all other cases, you will need to purchase building materials. Their type, size, volume, total number - all depending on the size of the planned building, which is determined by the project.
Prices for various types of timber
Foundation material
For any type of foundation, you will need the following materials:
- sand, crushed stone, cement;
- third-rate board and timber for formwork;
- brick or concrete blocks;
- waterproofing material (roofing material);
- expanded clay of the middle fraction.
Material for walls and roof
Since wood was selected for the construction of the walls, then, starting from this, other materials will be selected:
- bars and boards of different sizes, depending on the design parameters;
- fasteners - nails, screws, bolts, studs;
- corners of various configurations, metal plates - for fastening knots;
- vapor barrier film;
- insulation - mineral wool, ecowool or expanded clay;
- to cover the roof, it is better to choose a light material - ondulin or corrugated board.
After the installation site of the future house is determined, the materials are purchased, you can proceed to the arrangement of the foundation. True, to begin with, you still have to decide on its type.
The foundation of the country house
Even with the construction of such a small and light building as a wooden country house, you cannot do without a foundation. In this case, one of two types is ideal for these purposes - this is a columnar and strip foundation. Which one to choose depends on the preferences of the builder.
- A columnar foundation will be a less costly option, as it will significantly save on building materials. In addition, such a foundation can well be performed independently, without outside help, which will also save a certain amount.

How to build it correctly, you can find out with all the details by following this link to the corresponding page of our portal.
- To create a strip foundation, you will need not only more materials, but also a fairly long period. This is not surprising - around the entire perimeter of the future house it will be necessary to dig a trench, waterproof it, install the reinforcement structure, build the formwork and fill the pit with concrete. And after that, like it or not, it will also take a month before the filled tape completely solidifies and gains its brand strength.

However, strip foundations are still very popular with individual developers. This option is convenient in that it allows you to make a basement under the house, however, for this, the walls of the foundation will have to be raised above the soil surface by 700 ÷ 800 mm. described in detail in the article, which can be found on our portal by following the link offered.
If a columnar foundation is chosen, it is recommended to remove the topsoil by 150-200 mm from the site, which will be located under the house and around it by 500 ÷ 600 mm. Then fill the resulting pit with a layer of sand of 30 ÷ 40 mm, which should be tamped. A layer is laid on top of the sand cushion medium fraction crushed stone and also compacted, and the remaining space must be covered with expanded clay of the middle fraction. All these procedures are done so that small rodents cannot get close to the house. They do not tolerate expanded clay (especially fine), since it contains a large amount of dust and has a loose surface.
 Small fraction expanded clay is an excellent remedy for rodents
 To protect the house from the penetration of large rodents or other uninvited guests from the animal world, it is advisable to close the space under the house with a metal mesh with cells no larger than 10 mm.
Erection of a frame structure
 For a country house, the best choice is a frame structure
 The frame house can be placed both on a columnar and on a strip foundation. Erection always starts from the base, which must be reliable waterproofed two or three layers of laid roofing material.
- If the project provides for a veranda, you need to immediately separate its zone, over which the roof will be erected, but there will be no solid walls. To support the roof over the veranda, you can use the racks of the common wall frame. Other option - veranda will be attached to the house separately.
- Without exception, all wooden blanks must be treated with antiseptic compounds and fire retardants. These impregnations will increase the resistance of the wood to fire, to decay, will prevent the appearance of insect nests or colonies of microflora representatives - mold or mildew.

- After the blanks have received proper preparation and have completely dried out, during construction, the lower frame (crown) is first made, which will be laid on the foundation and will subsequently be used for floor installation.
For the floor to be reliable, it is necessary to take high-quality beams of the desired section for the frame. If funds allow, it is better to choose wooden elements not according to the "lower limit" of sizes, but by laying a certain margin in their section.
The table shows the optimal dimensions of the timber for a frame house:
- The supporting beams of the frame are mounted on crown bars located along the perimeter of the foundation, at a distance of 600 ÷ 700 mm from each other. They are fixed using corners or by inserting. If the elements are large in cross-section, they can additionally be fastened with metal brackets.

- When the bottom rail with support beams is ready, the wall frames are made. They can be assembled separately, and then, ready-made, lifted and fixed on the frame strapping bars.

Another option is to lift the frame directly into place. For example, if the house is being erected independently, without assistants, then it will be very difficult to lift the finished frame from the shade to the height of the strapping alone, set it evenly and temporarily fix it until it is finally fixed. This means that you will have to expose each of the bars separately.
- The size of the bars for the racks of the wall frame should be at least 100 × 100 mm, but it can also be mounted from boards with a cross section of at least 50 × 150 mm.
The bars are fixed to the lower harness using powerful corners that are able to keep them in an upright position. It is best to use a self-tapping screw instead of nails for fastening - the difference in price is not so significant, but the quality and reliability of the assembly is incomparably higher.
- When installing vertical posts, you need to immediately mark the location of the openings for windows and doors. It is best to leave the area where they are to be installed free in the frame, and install the part of the wall with the window opening separately.

Then, when the upper strapping bar is installed and fixed on all other vertical posts, the section with the window opening is fixed in the place left for it.
- All four walls are assembled in the same way. At the corners, the side posts are fastened together with corners, or instead of two separate ones, one common corner post is mounted. It is recommended to support it with diagonal struts on both sides - they will give rigidity to the entire wall structure.

- The doorway is installed in the frame immediately. It is reinforced with an additional stand, since the door suspended on the hinges has a certain weight, which must be calmly supported by both the fortified opening and the entire wall frame.

- If you plan to sheathe the frame from the outside with clapboard, then the next step is to carry out this event. The cladding will give the structure additional rigidity, which will allow the installation of the attic floor to continue and

Installation of the floor can be carried out immediately after the external wall cladding, but only if the roof is covered with a roof on the same day. It is highly undesirable for the newly laid floor covering to get wet if it suddenly rains at night. Therefore, it is better to first resolve the issue with the roof, and then calmly engage in all other construction activities inside the house.
Roof construction and roofing
Types of rafter systems
A few words need to be said about the types of rafter systems, since, moving on to the construction of a roof, you need to have a general idea of \u200b\u200bthis, to know which structure is better to choose.
There are two types of rafter systems - hanging and layered.
Hanging system
The hanging truss system differs in that it is arranged only on external load-bearing walls and has no other supports. It is perfect for construction over a small suburban building. In order to relieve the load on the wooden walls and on the foundation, the hanging rafters are tightened together.

The hanging structure itself consists of a transverse beam, which also performs an overlapping function, and can at the same time be a frame for hemming the ceiling, as well as of rafter legs that form roof slopes.
Naslonny system
The overhead system is mounted if the house, in addition to external walls, has internal capital partitions, which will become additional points of support. Such a scheme can also be used in the construction of the roof of a country house, if it has a large area and its rooms are separated by walls built on the foundation.

With this system, the load on the load-bearing side walls becomes weaker, so fewer retaining elements can be used. It is great for roof structures that will be used as living quarters.
Floor beams
 An important structural element - floor beams
 The beams are laid exactly above the vertical posts of the wall frame. In order for them to fit snugly on the upper strapping belt, grooves are cut out at their edges. The size of the grooves can be calculated using the formula shown in the figure.

Beams are fixed to the frame structure of the walls with the help of nails or self-tapping screws, and in addition they are sometimes fixed on both sides with metal corners.
Having completed the installation of the overlapping beams, you can proceed to building the roof truss system. For safety reasons, a temporary boardwalk is laid on the floor beams to ensure comfortable movement along the plane of the attic during the installation of rafters.
Installation of the rafter system

The roof rafter system can be mounted using a different sequence of fixing its elements:
- First option. It is necessary to fasten the extreme pairs of rafter legs on the ground, then lift them onto the harness and install them ready-made on the gable walls of the house. And then connect them with a ridge beam, and already mount the remaining pairs of rafters on it.
- Second option. To begin with, install the middle racks along the gables, then fasten them with a ridge bar or board, on which the rafters are then attached.
- Third option. In this case, the pairs of rafter legs in their upper part are attached to each other with a ridge lining, and their lower side is fixed to the wall trim, which in this version will serve as a Mauerlat.
The cross-section of the beams or logs used for rafter legs must be strictly observed - depending on the the length of the rafter between the two support points, and depending on the steps between adjacent pairs of rafters
| Maximum permissible rafter leg length (in mm) | The pitch of the rafters (in mm) | |||||||
|---|---|---|---|---|---|---|---|---|
| 1100 | 1400 | 1750 | 2100 | |||||
| Rafter leg section (in mm) | ||||||||
| cross-section bars | logs Ø | cross-section bars | logs Ø | cross-section bars | logs Ø | cross-section bars | logs Ø | |
| up to 3000 | 80 × 100 | 100 | 80 × 100 | 130 | 90 × 100 | 150 | 90 × 160 | 160 |
| up to 3600 | 80 × 130 | 130 | 80 × 160 | 160 | 80 × 180 | 180 | 90 × 180 | 180 |
| up to 4300 | 80 × 160 | 160 | 80 × 180 | 180 | 90 × 180 | 180 | 100 × 200 | 200 |
| up to 5000 | 80 × 180 | 180 | 80 × 200 | 200 | 100 × 200 | 200 | - | - |
| up to 5800 | 80 × 200 | 200 | 100 × 200 | 200 | - | - | - | - |
| up to 6500 | 100 × 200 | 200 | 120 × 220 | 240 | - | - | - | - |
It should be noted that the rafter attachment point in its lower part will depend on the angle at which they are fastened to the ridge, and how long they have.
If the rafter is long enough and protrudes beyond the bearing walls, then a cut is cut on it, with which it will be installed on the strapping bar (). An example of such a cut is shown in the picture:

If the rafter ends at the edge of the load-bearing wall, then its lower edge is cut at right angles to the Mauerlat, and the leg itself can be fixed on it using a special fastening plate, sliding support, angle, bracket, nails or long screws.

If the house is very small, then after fixing the rafters to the harness, tying them with a ridge bar or board, it is most likely not necessary to install additional supporting elements.
Detailed information about the exact one can be obtained from a special publication of our portal by following the recommended link:
For the installation of additional, reinforcing elements of the rafter system, the material can be selected in accordance with the recommendations indicated in the table:
Prices for various types of fasteners for rafters
Fasteners for rafters
Roofing system
After the rafters and additional elements form the roof slopes, you can proceed to the installation of the roofing subsystem.
- The first thing to do on the outside of the roof, after installing the rafters, is to lay a vapor barrier film, securing it first with brackets, and then with counter-lattice strips on the rafters.
The foil is laid perpendicular to the rafters, starting from the bottom, eaves of the roof. The overlap between two adjacent strips must be at least 200 mm.

- The main lathing is mounted perpendicular to the counter battens, on which the roofing material will be attached. The installation step of the guides depends on the type and size of the roofing material sheets.
If a soft roof is chosen to cover the roof, then instead of lathing slats, the slopes are covered with solid plywood, and then with waterproofing sheets of roofing material, which is overlapped by 150 ÷ \u200b\u200b200 mm and glued together with bituminous mastic. Another option is to use soft bituminous decorative tiles, which are laid using a similar technology.
- For wooden houses, the following roofing materials are most often used (depending on the steepness of the roof slope).
- On the prepared base, the selected roofing material is laid and fixed. The work starts from the cornice, and if the first row is laid from right to left, then all the other rows are mounted in the same way.
Some types of roofing materials have a strictly specified installation pattern in the direction, which cannot be changed. This must be indicated in the instructions attached to them.
Also, for any of the types of sheet roofing materials, the amount of overlap in the direction of the slope (usually 150 ÷ \u200b\u200b200 mm) and the number of waves (embossed protrusions) in the horizontal direction along the roof are determined.
- Almost all roofing materials are fixed to the crate using special nails or self-tapping screws with waterproofing gaskets.

- It is very important to choose and fix the ridge elements of the roof correctly, otherwise it will swell at the first rain. Typically, the ridge element is selected from the same material as the covering of the roof slopes.
- Further, the eaves overhang of the roof is finished - this can be done with wooden or plastic clapboard. Sometimes special plastic elements are used for these purposes - soffits.

- Then the elements of the roof drainage system are installed on the wind board - funnels, gutters on brackets, pipes, etc.

- Further, the gable sides of the rafter system are sheathed. Most often, a wooden or plastic lining or even planed boards are used for this.
For the lining, a special profile is fixed along the perimeter of the pediment triangle, into which the panels prepared and cut at the desired angle will be installed. Installation is usually done symmetrically - from the middle post to one side and then the other side - then the sheathing will turn out to be even and neat.

By the way, mount the lining, besides, you can horizontally, herringbone, or come up with a more complex pattern.
Detailed information about the technology can be found in the article posted on our website by going through link.
Now, having finished with the external finishing of the roof and being sure that the rain will no longer fall inside the country house, you can proceed to the installation of windows and doors, insulation, flooring and wall cladding.
Installation of windows and doors
- Window frames are mounted in the frame openings left for them, set in level. For preliminary fixation when setting the frame between it and the bars of the opening, spacers of wooden bars or slats are installed.

Then, after checking the correct installation, the frames are attached to the wall frame with metal strips. The remaining gaps between the frame and the frame beams are filled with polyurethane foam. After it dries, the excess is cut off, and platbands are installed around the windows on the outside of the wall, which will close the unsightly appearance of the gaps and give neatness to the overall appearance of the house.
- It is best to install the door together with the door frame if it has sufficient rigidity. This will make it much easier to level the entire structure in the wall doorway.
 It is best to install the door in a block - together with the frame and leaf
 Exposing the door frame, if necessary, to achieve a clear vertical position, put wedges (inserts) from wooden slats. The door frame is fixed to the frame in the same way as the window frames using metal strips, and the gap is filled with mounting foam.
Having installed windows and doors in all, you can proceed to the installation of the floor.
Installation and floor insulation

To begin with, the temporary flooring from the boards (if any) is removed from the lower frame, and then the sub-floor needs to be installed.
- For this, cranial bars are nailed or screwed onto the frame supporting beams. They are necessary for laying transverse subfloor boards on them.

- Further, boards, sawn exactly to size, or plywood 8 ÷ 10 mm thick, are laid on the cranial bars - this flooring will serve as a subfloor.
- From above the laid sub-floor is closed by hydro - steam— insulating film, which should cover both the supporting beams and the entire floor plane. Individual sheets of material are overlapped (150 ÷ \u200b\u200b200 mm) and glued at the joints with waterproof tape.

- Further, an insulation material is laid or poured onto the vapor barrier film. If there is no desire to have as neighbors who like to settle under the floor, then it is better to use expanded clay of medium or small fraction for floor insulation, or ecowool - these toothy pests simply do not live in such materials.

- On top of the insulation, another layer of film membrane is laid, which is nailed to the supporting beams with brackets. The laying principle is exactly the same as on the subfloor.
 With the floor - finished!
 - Then the entire structure is covered with thick plywood or wooden floorboards.
Prices for thermal insulation materials
Thermal insulation materials
Additional thermal insulation measures
When the floor is completely ready, the walls of the house are insulated and sheathed from the inside. If the building will be used only in the warm season, then the insulation will still not hurt - it will work as an insulator of premises from heating in extreme heat. Therefore, it is recommended to lay the thermal insulation layer not only in the walls, but also in the ceiling, and if it is absent, place the insulation along the inner slopes of the roof.

- First, a vapor barrier is attached to all walls and ceiling beams. Then the ceiling is sheathed with clapboard, plywood or plasterboard.
- After covering the ceiling, the walls are insulated. At the same time, the insulation mats are laid between the frame posts. It is necessary to make sure that the mats fit as tightly as possible with an emphasis on the bars of the wall frame, so that there are no gaps left.

That is why mineral wool is most often used as a heater - after dense laying between the racks, it will straighten, completely filling the entire space. The material is usually selected so that the thickness of the mats and the thickness of the frame posts are the same.
- After that, all walls are again covered with a vapor barrier film.

- The next step is wall cladding with wooden clapboard, plywood or. The latter, with subsequent decorative wall decoration, can be painted with water-based paint or pasted over with wallpaper.

- Further, the attic floor is insulated, there insulation is placed between the floor beams.
If the ceiling is sheathed from the side of the house with plasterboard or clapboard, then we must not forget that you cannot step on it, since the sheathing will not withstand the weight of a person. It is necessary to move carefully along the floor beams.

- In the event that the attic is planned to be used for storing various garden accessories, then on top of the insulation on the floor beams, you need to fix the flooring made of boards or plywood with a thickness of at least 10 mm.
- The finishing touches of the interior decoration will be the installation of platbands on windows and doors, ceiling and floor skirting boards and closing the corners with fittings slats.
House extensions
The last stages of the arrangement of the country house are installation work on the veranda and on the porch.
If a place has been left for the veranda on the frame lying on the foundation, then a board is laid on this space to cover the floor (material for open areas is used), a fence is installed and a canopy is mounted.

If the foundation is raised high enough above the ground, then a porch is also attached to it.
Building a country house with your own hands is a completely doable task, but it will be quite difficult to do without helpers. Therefore, it is best to seek help from a knowledgeable master who has experience in such work, will always give useful advice and show how certain nodes are correctly mounted in the structure of the house. You can "mobilize" relatives and friends - it is possible that a knowledgeable person will be among them.
Video: construction of a country house using frame technology
(17
estimates, average: 4,41
out of 5)
 Have you purchased a summer cottage? Then you can safely congratulate you on the beginning of your summer cottage life! Surely this was a long-awaited event for you, and now you are in anticipation of growing your own fruits, vegetables and just a wonderful holiday as far from the bustle of the city as possible. Very often plots are sold with houses already built on them, but if this is not your case, and you definitely want to build a summer house on your own, then our article is for you. Today we will talk about the types of country houses, materials for their construction and how to inexpensively build a country house with our own hands.
How to save
Mostly they choose for giving small compact houses, consisting of a kitchen, bedroom, bathroom and veranda. Do-it-yourself construction of a country house is not necessarily a high-cost and time-consuming process. It is quite possible to choose an inexpensive house project that meets all your requirements for comfort and convenience. If the budget is strictly limited, then you can save on building materials. The main thing is that the building is safe. Before starting construction, you need to choose the exact location of the future house, choose a ready-made one or create your own project and decide on the materials.
Seat selection
The construction of country houses is a must starts with choosing a seat... Basically, the area of \u200b\u200bsuch a house is from 24 to 30 square meters. Larger dimensions are used much less often, most often it is no longer a house for the summer cottage, but a place where you can live all year round with a large family. When planning the location of your home, you should mainly rely on the requirements of your horticultural partnership. But there are also basic requirements that do not depend on the region and local administration. Namely:

In order to avoid flooding during the period of heavy rainfall and melting snow, it is better to build the cottage on an elevated place. Excessive moisture leads to faster deterioration of the materials from which you will build. This is especially true for timber frame houses.
Types of country houses
Most often, one-story buildings with an open or closed veranda are erected in the country. Very popular cottages with attic - since it can store a considerable amount of things that are not used daily. If there is no attic space, then the roof will be the ceiling. There are three most common types of country houses:
- log cabin;
- frame country house;
- block or brick house.
 But what if you have a large family, and there is not as much space for construction as you would like? There is a wonderful way out - build a two-story house... The first floor can be used as a kitchen and living room, as well as a terrace, but on the second floor there will be excellent lounges.
When composing a project for your summer cottage, take care of insulation. Despite the fact that the summer house is used in warm seasons and requires insulation of walls and floors as such, there are rainy, cold days in which you will certainly want to warm up. Mostly summer residents use heating devices such as convectors, oil radiators and electric heaters. But if desired, the construction of a stove or fireplace can be included in the project of the house.
Material selection
If you have already prepared a project for your house, then it's time to do selection of material for its construction... The total cost of the house, its comfort and appearance directly depends on the choice of building materials.
The most popular material is undoubtedly wood. Many people make a choice in favor of wood due to its environmental friendliness, pleasant smell and relatively low price. It remains only to choose - there will be a construction from a bar or logs, or generally give preference to the frame type. Despite the high flammability of this material, you should not be so afraid to build from wood. Indeed, today there is an incredible assortment of all kinds of impregnations and other coatings that protect wood coatings from the effects of fire and minimize the risk of a sharp fire. Well, in general, everything depends on you yourself - how careful and responsible you are in matters of security.
Build a brick house is a much more expensive undertaking. But there is a significant advantage over wood - the durability of such a structure and a higher fire safety, since it is much less exposed to fire. And when you install a stove or heating in such a house, you can easily spend the winter. Probably the only drawback is high financial costs and a longer construction process. You can safely attach block houses made of foam concrete and expanded clay concrete blocks to the same category.
Most often, several types of materials are used at once. For example, the house itself is frame and is built of wood, and the foundation is built of concrete and bricks. In principle, this option can be called optimal, since it includes a moisture-resistant foundation and an excellent basis for timber frame walls. It is the construction of this type of country house that we will consider in more detail.
Construction stages
 For a start, clearly calculate the amount of all building materials, which will be needed to build a house. Decide in advance on color and texture solutions. The number of purchased materials directly depends on the project of your house. If you do not have the time or desire to carry out detailed calculations of all costs, then you can buy a prefabricated model of a finished house. This will simplify the construction process - after all, all you need to do is prepare the required area and, in fact, the assembly itself. But, if you still want to build a house inside and out with your own hands, then be patient and start this, though difficult, but pleasant business.
Foundation
You need to purchase:
- sand, cement, crushed stone and expanded clay (middle fraction);
- boards and bars are not of the highest quality;
- concrete blocks or bricks;
- roofing felt or other vapor barrier material.
There are two main types of foundations for summer houses: strip and columnar. Which one to choose is only your decision. Columnar is chosen much more often because of the lower need for building materials and its simple design, which can be easily dealt with alone. The strip foundation is stronger and more durable, but much more building materials will be required. And the construction process itself is quite time consuming - you need to dig trenches around the perimeter of the house and all rooms, isolate it from moisture, lay reinforcement and fill everything with concrete. Moreover, it takes almost a month for such a foundation to solidify.
Walls and roof
For wall and roof construction purchase in advance:

Further, the installation of the support beams is carried out at a distance of at least 60 centimeters from each other. They are attached to the crown bars with metal corners. After that, you can start building walls. You can assemble the frame separately and attach it ready-made, or start assembly right on the strapping bars. The size of the bars for frame walls should be at least 10 by 10 centimeters. If you are using boards, their section should be at least 5 by 15 centimeters.
When installing uprights, remember to openings for windows and doors... The door opening must be additionally reinforced with an additional post. After the construction of the frame, they are engaged in sheathing. Most often they use lining. It is advisable to perform the sheathing process before covering the roof, as this will strengthen the entire structure and add rigidity to the walls.
 When installing the roof it is necessary to decide on its type. A flat roof is more simple and economical in design, but the most popular is still a gable roof. The rafter structure of such a roof can be layered or suspended. For a small house without load-bearing walls inside, a hanging rafter system is quite suitable. Hanging rafters are secured with a special pull-down and thereby relieve unnecessary stress on the walls. The overhead system presupposes the presence of load-bearing walls, on which additional rafters are supported. After installing the rafters and ramp elements, you can proceed to the roofing.
This process begins with vapor barrier film gaskets - this is done perpendicular to the rafter system, and each next layer must be overlapped with the previous one. Only after that you can start laying the corrugated board or other material you have chosen for covering. Don't forget to organize your drainage system.
So, the walls are up, the roof is covered - which means it's time to start installing windows and doors. Following this, you can insulate walls and floors and engage in interior finishing work.
Each of us dreams of a quiet and cozy country house where you can escape from the bustle of the city and just relax. Modern building technologies allow you to buy a garden house ready-made or build it yourself. In this article, we will tell you how much it costs to build a garden house, what documents are required to put it into operation, and whether you can do without them.
A budget version of a country house made of plywood
Plywood garden house designs take less time to build than timber houses. Due to the use of large sheets of plywood for cladding the structure, they are fastened much faster than wood. With knowledge of all the processes and the availability of the necessary materials, plywood garden houses are built in a week. In general, plywood is the simplest and most inexpensive material. In order to facilitate the construction process, experts suggest the following stages of construction. So how to build a plywood garden house:
- foundation support devices;
- frame erection;
- erection of vertical rafter supports;
- top and bottom cladding;
- creating a subfloor using boards 20 cm or more thick;
- the outer cladding of the house with plywood, ordinary self-tapping screws are used as fasteners;
- interior cladding of the house involves the use of plywood, drywall, chipboard or fiberboard;
- for a comfortable stay indoors, it should be insulated: a layer of mineral insulation is laid between the layers of the cladding;
- installation of a finished floor using a laminate board or linoleum;
- sheathing of rafters with plywood;
- sheathing of plywood with roofing felt.
Important! You can move around the frame only after the concrete has completely frozen.
To give an attractive appearance, you can use siding or wooden paneling. Windows in the house can be installed from wood or any other material. The video shows how you can build a garden house with your own hands
Building a house from a bar
The project of a garden house from a bar involves the use of a simple or profiled bar. Country houses from this material can be built both with the help of specialists and independently. The plan of a house from a bar allows you to build various structures. For example, you can make a log house with a veranda or terrace. Before building a house, you need to decide on the type of foundation. As a rule, for houses from a bar, a columnar or tape type of base is used. When designing a small summer cottage, a columnar foundation would be the best option; for large houses with an attic, it is better to use a strip foundation. The construction of the foundation begins with laying concrete slabs on a compacted layer of sand, and lowering it into the ground by 15 cm. When the foundation is ready, a layer of waterproofing from roofing material is laid on it. Next, the frame is installed and laid on the base supports. Then we install the vertical supports. The photo shows the frame of a garden house from a bar

If you like houses with a veranda, the lower logs are extended to the desired length and installed on additional supports. You can use a thick board for flooring. When the floor is ready, the walls are laid from a bar. A dowel is used to secure the joints, a new crown is laid after a layer of insulation. Insulation is required for each layer; jute or tow can be used as a material. Next, we equip the roof. To do this, we carry out the installation of rafters and braces. After everything is sheathed with roofing material, finishing work on the flooring is performed. As a rule, linoleum or board is used as a coating. The next stage of construction will be the installation of windows and doors. From the outside, the house can be made more attractive with siding or clapboard. A house built from a bar is quite cheap and warm.
Layout of a garden house and its cost
The construction of a summer house assumes the presence of a small and simple building on the garden plot. As a rule, such houses are built of a small area, with one or two rooms, a kitchen, a bathroom, a stove (if any are provided for by the building project). The photo shows standard projects of suburban structures:
If you decide to build a garden house with your own hands, we advise you to choose a small house with dimensions of 4x6 or 6x6. The photo shows a 6x6 summer cottage

If you like space, you can take a 6x8 house project. The photo shows a project of a two-story garden house with a size of 6x8

Such projects can rightfully be considered quite comfortable, cozy and spacious for temporary residence with the whole family. But how much it costs to build a garden house will depend on the materials chosen and the attraction of additional strength. The average cost of an ordinary country house will cost:
- setting up the foundation on its own will cost $ 150, and with the involvement of specialists - $ 250;
- interior decoration will cost $ 700;
- a house with a frame, ready-made partitions, windows and doors can cost from 3,000 to 4,000 thousand dollars;
Paperwork

When construction is over, you need to think about the documents. Any building must legally stand on a land plot, regardless of who built it a garden partnership or you yourself. To obtain the right to property, the following documents are required:
- obtain a construction passport for building a land plot. Such a document is issued by local architecture;
- submit an application to the architectural and construction inspectorate with notification of the start of construction;
- conduct a technical inventory of the building, such work is performed by professional appraisers who have a special permit to perform such work;
- submit a declaration of commissioning of the property;
- assign your own postal address to the building (addresses are assigned to residential and suburban buildings);
- to pay a contribution for the development of infrastructure, as a rule, such contributions are made either by the partnership or the owner of the house individually;
- obtain from the state registration service a certificate of ownership of the building.
Of course, for a gardening partnership, such documents are drawn up faster, here the number of participants in the gardening society plays a role. In addition to the above documents, there are also requirements for the building itself. The most expensive and difficult thing is obtaining a construction passport, because there is a fairly large number of norms and building rules that regulate the conditions of development. Common building requirements include:
- the distance from your house to the next one should be 0.8 m;
- the distance to the border of your site should be 1 m;
- distance to the street - 3 m;
- the distance of the house to utilities and networks is 3 m.
Expert advice! Do not settle for “fake documents”, this will only complicate the situation and lead to unnecessary waste.
As you can see, the construction of country houses is considered simple and affordable for everyone. To make your dream come true, you need to draw up documents and choose a building project.
Communication with the natural environment, the presence of a country or country house has become an absolute necessity for any modern city dweller. People today are tired of the hustle and bustle, noise, offices, huge shops, in a word, from urbanization. They dream of getting out, at least for the weekend, closer to nature, admiring the colorfully blooming vegetation, and listening to songbirds. The best warrant for this is your own summer cottage. If the budget for making your dreams come true is not a problem, today it is not a problem to build a country house with your own hands. Arrangement of terraces, various flower beds, alpine slides, verandas and other garden attributes next to the dwelling will bring you closer to the surrounding landscape, returning to nature, a natural and organic environment for humans.
The procedure and stages of construction of a country house
- DIY construction of a country house, even if it is very small, at first glance it may seem like a very simple matter that does not require close attention and lengthy preparation. But if you want to create a small but durable and cozy family nest, you should take it seriously.
Before starting all the purchases and construction work, you need to decide on the family council what the purpose of your house is: whether you want to garden, or just equip a recreation area and come for the weekend, whether you will be at the dacha during the cold season, and whether you will you host.

Country house project 10 × 8

Country houses projects and photos of which are presented in the article will differ from a suburban building only in that they primarily provide for a single connection with a vegetable garden, garden or flower garden, even if the latter is completely small.


Construction Basics
- First of all, it is worthwhile to think over well the entire layout of the available space, very often every piece of land counts with summer residents, so it should be used competently and effectively.
- It is very important that the minimum permissible distances to your neighbors on the site and to the roadway are observed. To the neighboring plot - three meters, and to the street - five meters.
- Places where there are depressions are not suitable for building a house, since water will accumulate there after rains. Ideally, the highest available location on the north or northwest side of your allotted area.
- Next, it is worth deciding in general terms what you are going to build a house from. Possible options are listed below, but you need to take into account soil conditions, weather conditions, budget, transportation costs and availability of labor.
On a note! After the construction site has been determined, the desired design of the country house is selected, for which a beautiful project is being developed, or a ready-made beautiful project is selected.

Choosing a turnkey country house project (photo)
The first thing to think about after discussing the above issues is the project. Very often, future gardeners who want to quickly build a country house on their site go to private construction companies, in which managers often offer them expensive luxury projects. However, in order to build a small garden house with your own hands, you can limit yourself to much less.
An inexpensive and quite decent garden (or country) house can be built according to a typical standard project. Individuality and originality can be given to it with the help of outdoor decoration and plants surrounding it.


Nowadays, a ready-made project of a turnkey country house is easy to find on the Internet. But looking through such sentences, you should also take into account some very significant aspects, for example:
- total estimated cost of the box at home;
- duration and quality of construction;
- labor intensity of earthworks;
- complex of services for the construction of the foundation.
On a note! Even small garden houses should have utility rooms for storing garden tools, take these things into account as well.


Foundation options for a country house
Concrete base (foundation) - serves as a kind of support for any home. It must withstand the loads that are created by the house, both during construction and after putting it into operation.
Important! A good foundation must be strong, frost-resistant, waterproof, since the structure is affected by groundwater and active elements.

The foundation of the garden house is designed to ensure the complete stability of the structure under construction, as well as the reliability of its future operation. The most correct in a particular case (country house) will be the types of foundations listed below.
- Tape type of foundation Is a structure made of a monolithic concrete strip, which is formed along the entire perimeter of the future house. Such a structure is very often used in the construction of two-story houses, it is stable and wear-resistant, and is also suitable for brick houses. It should be borne in mind that such a foundation will be expensive and not so fast to build.
- Column foundation - more economical, it consists of pillars that are recessed and installed in all corners of the future building, at the joints of all walls, as well as inside, in place of the planned partitions. It is good for small one-story houses that will weigh a little, for example, frame or panel cottages.
- Pile type foundation - consists of groups of piles that are sunk directly into the ground and bonded together with reinforced concrete. If your summer cottage is located in a place prone to waterlogging, then you will have to make just such a foundation. By the way, it is piles that are used in the construction of foundations for small cottages, brick buildings, large frame-type houses and classic wooden log cabins.
- Monolithic slab foundation - is a monolithic slab made of reinforced concrete, it also serves as a floor in the house, insulation, boards, and other covering are placed on it. Such a foundation should be chosen if your site is located in a place of stable soil, it can be the basis for both a one-story house and a two-story one.


A budget country house is a matter of the future
Modern traditional houses for summer cottages are so diverse, sometimes interesting in their design, that it is not easy to make a decent choice of the ideal option for your family. Nevertheless, try to discard emotions, and soberly weigh the pros and cons.


Modular house
The most affordable, simplest, fastest methods for building a small house is to assemble a building from a ready-made panel board. This group also includes houses made of structurally insulated externally panels.
This can also include various options for modules, as well as small country houses made of container blocks. Their clear advantage is the ease of installation work, because you actually only need to properly prepare the base (foundation) and then install the finished structure on it.

Among the obvious disadvantages of this "construction" method, one can clearly distinguish both high prices for modules and a small number of possible variations. However, the acquisition of a so-called building designer makes it possible to independently build a country house with their own hands, even for beginners without prior experience in this area.
In addition, in such a house, as a rule, manufacturers already have all the communications necessary for life. Due to this, it is possible to avoid traditional mistakes, which are often made out of inexperience.


Country houses-huts
There are obvious shortcomings in the small house in the form of a hut, which is vaguely similar to a real "chalet". It fits perfectly into the natural environment, looks very elegant and organic.
A hut usually retains all its advantages when it is made no more than 6 × 9 meters in size, after which it automatically becomes somewhat difficult to execute. In addition, the construction of a large hut will require a lot of building materials.

In a small house in the form of a hut, one sleeping place will have to be arranged in the attic. There you will need to climb the usual vertical ladder, but this is quite within the power of the younger generation.
In the American states and in the forest of Canada, such single houses are ubiquitous. Not only hunters, fishermen and beekeepers find shelter in them, but also seasonal tenants who wish to live in the warm season in the natural environment.

For a small family of two or three people, a hut 3 × 3 meters may well become a summer cottage for seasonal living. It will be possible to come to the house in spring, summer, late autumn, since the heating costs will be low, and it heats up much faster.
On a note! If you are going to come to the cottage all year round, but you don’t want to spend a lot on construction, then such a hut will be the best choice.

Real bungalow
In the traditional sense, a bungalow is a one-room summer house without heating. As a rule, he settles down in a large open space, which is constructively connected with the house.
For a traditional summer cottage, to which a family living in a relatively warm climate plans to come only on weekends, such a bungalow-type house is optimal because it is spacious, well ventilated, and does not get too hot by the sun.

There are not many materials for the construction of such a house, it is made of wood. The bungalow house is very durable, it can be built on a not very deep foundation, on soils that are not too stable, including in areas prone to waterlogging.
Moreover, in damp areas, houses that are built in the form of a bungalow are very durable, due to the fact that all the upper ends of the boards are usually covered with overhangs from the roof, traditional for such a construction.
Frame country house
Prefab houses are becoming more and more popular, although wood is a traditional building material for our region. The ecological purity of such a structure is obvious, while the house, if it is correctly built, retains heat perfectly.
A frame-type country house should be built in the traditional style of wooden housing construction, approximately as our ancestors did. It is desirable that it be one-story, in extreme cases, have an attic. It will be cozy and comfortable to live in such a house all year round, and its construction will not scare you with scale and costs.


Which country house is better: one-story or two-story
A one-story garden house - a certain philosophy, worldview. Such a dwelling is much more comfortable, because it does not have a leading to the second floor. Of course, for young people to quickly run upstairs is not a problem, however, in mature years this option will definitely be less convenient.
A one-story house is safe for children. Many summer residents who have chosen housing on two floors leave reviews that after a few years running up the stairs is very annoying, and the statistics of injuries of people on the steps of the stairs speaks for itself.

Perhaps you have made the decision to build a house of aerated concrete at your dacha, and are going to do it yourself. This is a great idea if you have little experience in construction.
The same goes for a brick country house. Bricklaying is not an easy process and requires experience. But the obvious advantage of such a dacha is that it will serve its owners for many years and will be inherited by the children.


For many years, most of the inhabitants of megalopolises have dreamed of a small beautiful house entwined with climbing roses in a picturesque area where you can always hide from the sweltering heat and take a break from the hustle and bustle. Make your dream come true, because a cottage with your own hands is quite real!


Now it is not at all necessary to chase after prestigious houses, building a palace, because now it is difficult to surprise. It is much more interesting to create a small but cozy and atmospheric house, which you won't want to leave. Having worked carefully on the creation and design of a country house, you can build a place for physical and mental rest. Having built a country house with your own hands, you can embody all your dreams and childhood fantasies in it to create an ideal vacation spot.


Choosing the best place
If you start building a house on a land plot, then you must follow the generally accepted building rules, so you should not rush to dig a foundation pit ahead of time. According to legal acts, the house must be located in accordance with the following location requirements:
- no closer than five meters from the street;
- at least three meters from the carriageway;
- the distance to the neighboring building is 3 or more meters.


Now you need to roughly see what happens, since this should be carefully monitored. If the construction site has fallen to the lowland, then you need to look for an alternative, since you cannot put a house in the pit. By placing a house in a lowland, you can condemn it to constant flooding from melt and rainwater. Ideally, you need to find a place on a hill, preferably in the northwest side of the land. If the terrain is flat, then a drainage system will have to be built.


Options for successful projects
You can build a small house, but this does not mean that it will not be comfortable. Having at your disposal a small area, you can be able to properly dispose of it so that all the necessary rooms are present in the building. The veranda is one of the mandatory attributes of a country house, because there the family will spend all their gatherings.


The most popular option for a country house is a one-story building with an attic. This option has long been tested by time and has further development prospects. With the help of the attic, you can refuse to build additional utility buildings. Outdoor terraces are often attached to houses of this type, where you can have a great time in the summer, equipping them as dining rooms in the fresh air.
Having built an attic, you can increase the useful area of \u200b\u200bthe house, while you do not need to build a second floor, it will be enough that the roof will be modified and slightly raised up. In this case, it is best to place the bedrooms on the second floor, and leave the first one for the kitchen and living room.


Also, the best option would be a hi-tech house. The topic of twin houses remains relevant. There are two houses on the land plot, one of which is a reduced copy of the second. Such houses are especially popular for those who like to relax in a large company, because you can give a smaller part for guests, while not embarrassing each other.
Country house made of timber
An excellent option for the construction of a country house, since it is economically profitable, in addition, during the construction of such a structure, global finishing work will not be required. In addition, it will be environmentally friendly, which means it will always be comfortable inside it. However, despite this, there is a significant drawback - the complexity of construction. That is why it is unlikely that you will be able to build it yourself; you will have to resort to the help of professional builders.


Stone country house
A country house built of stone is an unbearable luxury. Naturally, this is the strongest and most durable option, but it is also the most expensive. It is worth it or not to decide only for those who want to start building a personal country house for the whole family to relax. The material can be used:
- brick;
- gas and foam concrete blocks;
- shellfish;
- natural stone.
It is almost impossible to build such a house independently and quickly. If you do not delay construction for tens of years, leaving an incomprehensible structure on the site, then you should contact specialists (bricklayers) who will do the work for the owner many times faster.


Prefabricated structure
Recently, these houses have ceased to be unattractive and boring, because now manufacturers offer original architectural structures on one or two floors with an improved layout. Building such a house is a pleasure. In fact, this is an original and large construction set, which is easy to assemble, and special skills and knowledge are not required.
On a positive note, communication systems are already provided here, including:
- electrical wiring;
- ventilation and air conditioning systems;
- water pipes.


Thanks to this, the beginner avoids various mistakes that would be possible and will be able to build a house with his own hands. There are also built-in ones here:
- kitchen;
- bathroom;
- rest room.
Due to the fact that there is electricity and heating, the use of the house is possible even in winter. Having filled the house with the necessary plumbing and furniture, you can safely move into it and live at any convenient time or on an ongoing basis.
Frame house
Frame country houses are a low-budget option that you can build yourself. The construction technology is simple, which means that you can handle it yourself. Although, sometimes you still have to use a couple more free hands, but for this you do not need to hire specialists, it is enough to ask 1-2 friends for help. If you get involved in a construction site with your head, then in 2-3 weeks the house will be completely ready.


DIY construction of a frame house
Foundation
If it was flooded by the past owners, then it was lucky and all that remains is to adjust the required perimeter using columnar technology. The previous foundation needs to be protected, for this you need to dig a trench around it half a meter deep and apply a waterproofing compound to the walls of the foundation, and then overlay it with hydroglass.
If the foundation is laid from scratch, then it is necessary to clear the site for construction of fertile soil, moving it to the city in order to use it in a rational way. Instead of earth, you need to fill in sand, after which you can dig a ditch, filling it with the necessary material. The solidified foundation must be waterproofed and covered with hydroglass. For the basement floor, air vents are made in the foundation for anchors with studs (9-12 pieces). The base must be made of brick, its height is 1 meter.
After the stage with the foundation has been passed, it is necessary to start assembling the basement, it is best to do this according to the "platform" scheme, which is made of beams or wooden beams.
Walls and their output
The walls are assembled on the surface of the finished floor, the modules must be fixed to the bottom of the squared rail. The frame walls are large enough, so it is better not to install them yourself, but ask the help of your comrades to do it collectively. The total installation time for all walls of the house is 1 week. The main thing here is to correctly connect the corner zones with the transverse straps and secure them securely with spikes or brackets. After the walls have been installed, it is necessary to start strengthening the frame with the help of braces and struts, which plays an important role.
Roof
The structure of the roof of a frame house consists of a rafter system and a roofing part, the second includes:
- rough coating;
- layers of steam and waterproofing;
- decorative coating.
The rafter system must be assembled according to a carefully designed project, the height of the attic is 1.5 meters. The optimal shape of the roof is 4-pitched, the roof installation time is 5-7 days.
Wall cladding
The frame of the house must be sheathed with an inch board. In order to give the structure additional reliability, part of the sheathing is attached at an angle. A more expensive option is to use cement particle boards instead of boards. Sheathing should start at the front, continue with the side walls and finish at the back of the house.
This is followed by the final work on the exterior of the country house, which includes:
- roof;
- outlet of pipes and chimneys;
- installation of a ridge aerator;
- wall cladding and decor;
- fixing cladding panels.
If you set a goal for yourself and quickly go towards it, then in 3-4 weeks you can admire your finished work in the form of your own country house, built with your own hands. Now you can do the interior work and filling the interior to your taste. Here you can embody all your ideas and desires, filling the house with original furniture, stylish decorative gizmos and other things that seem necessary.
Tags: https: //www..jpg 662 991 Nuke https: //www..pngNuke2017-11-19 15:58:11 2017-11-19 15:59:46 Country house with your own hands